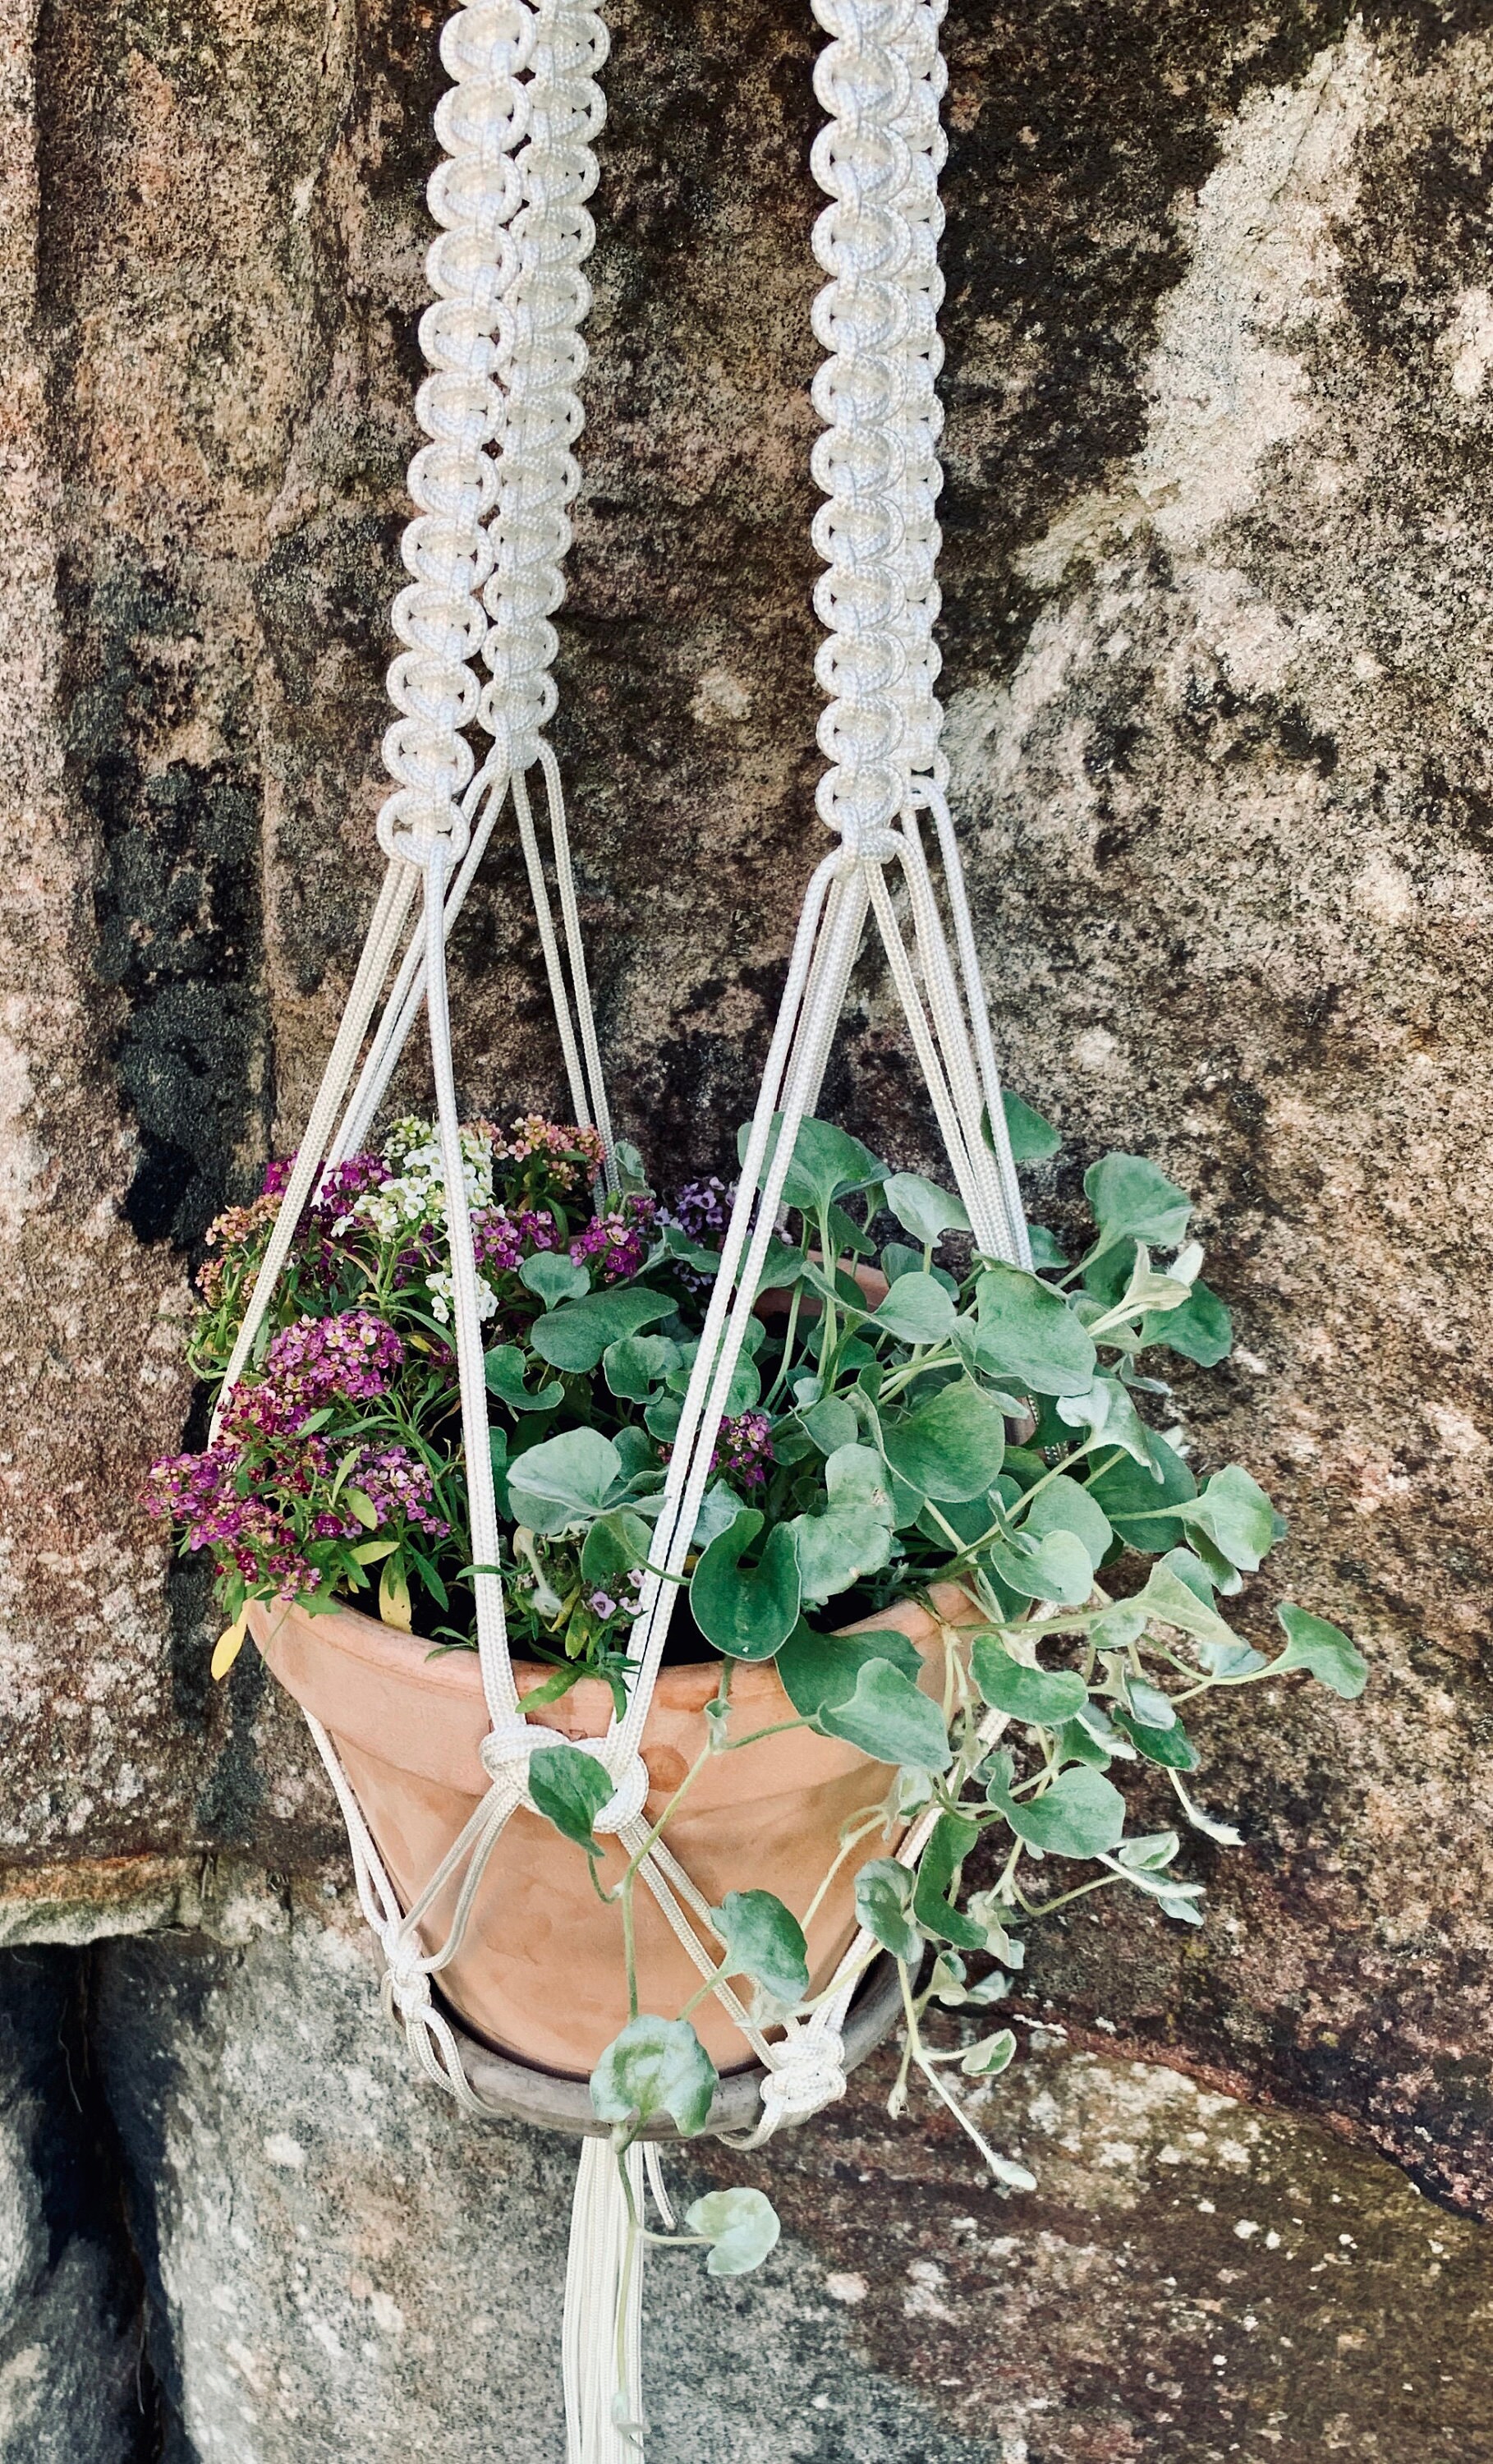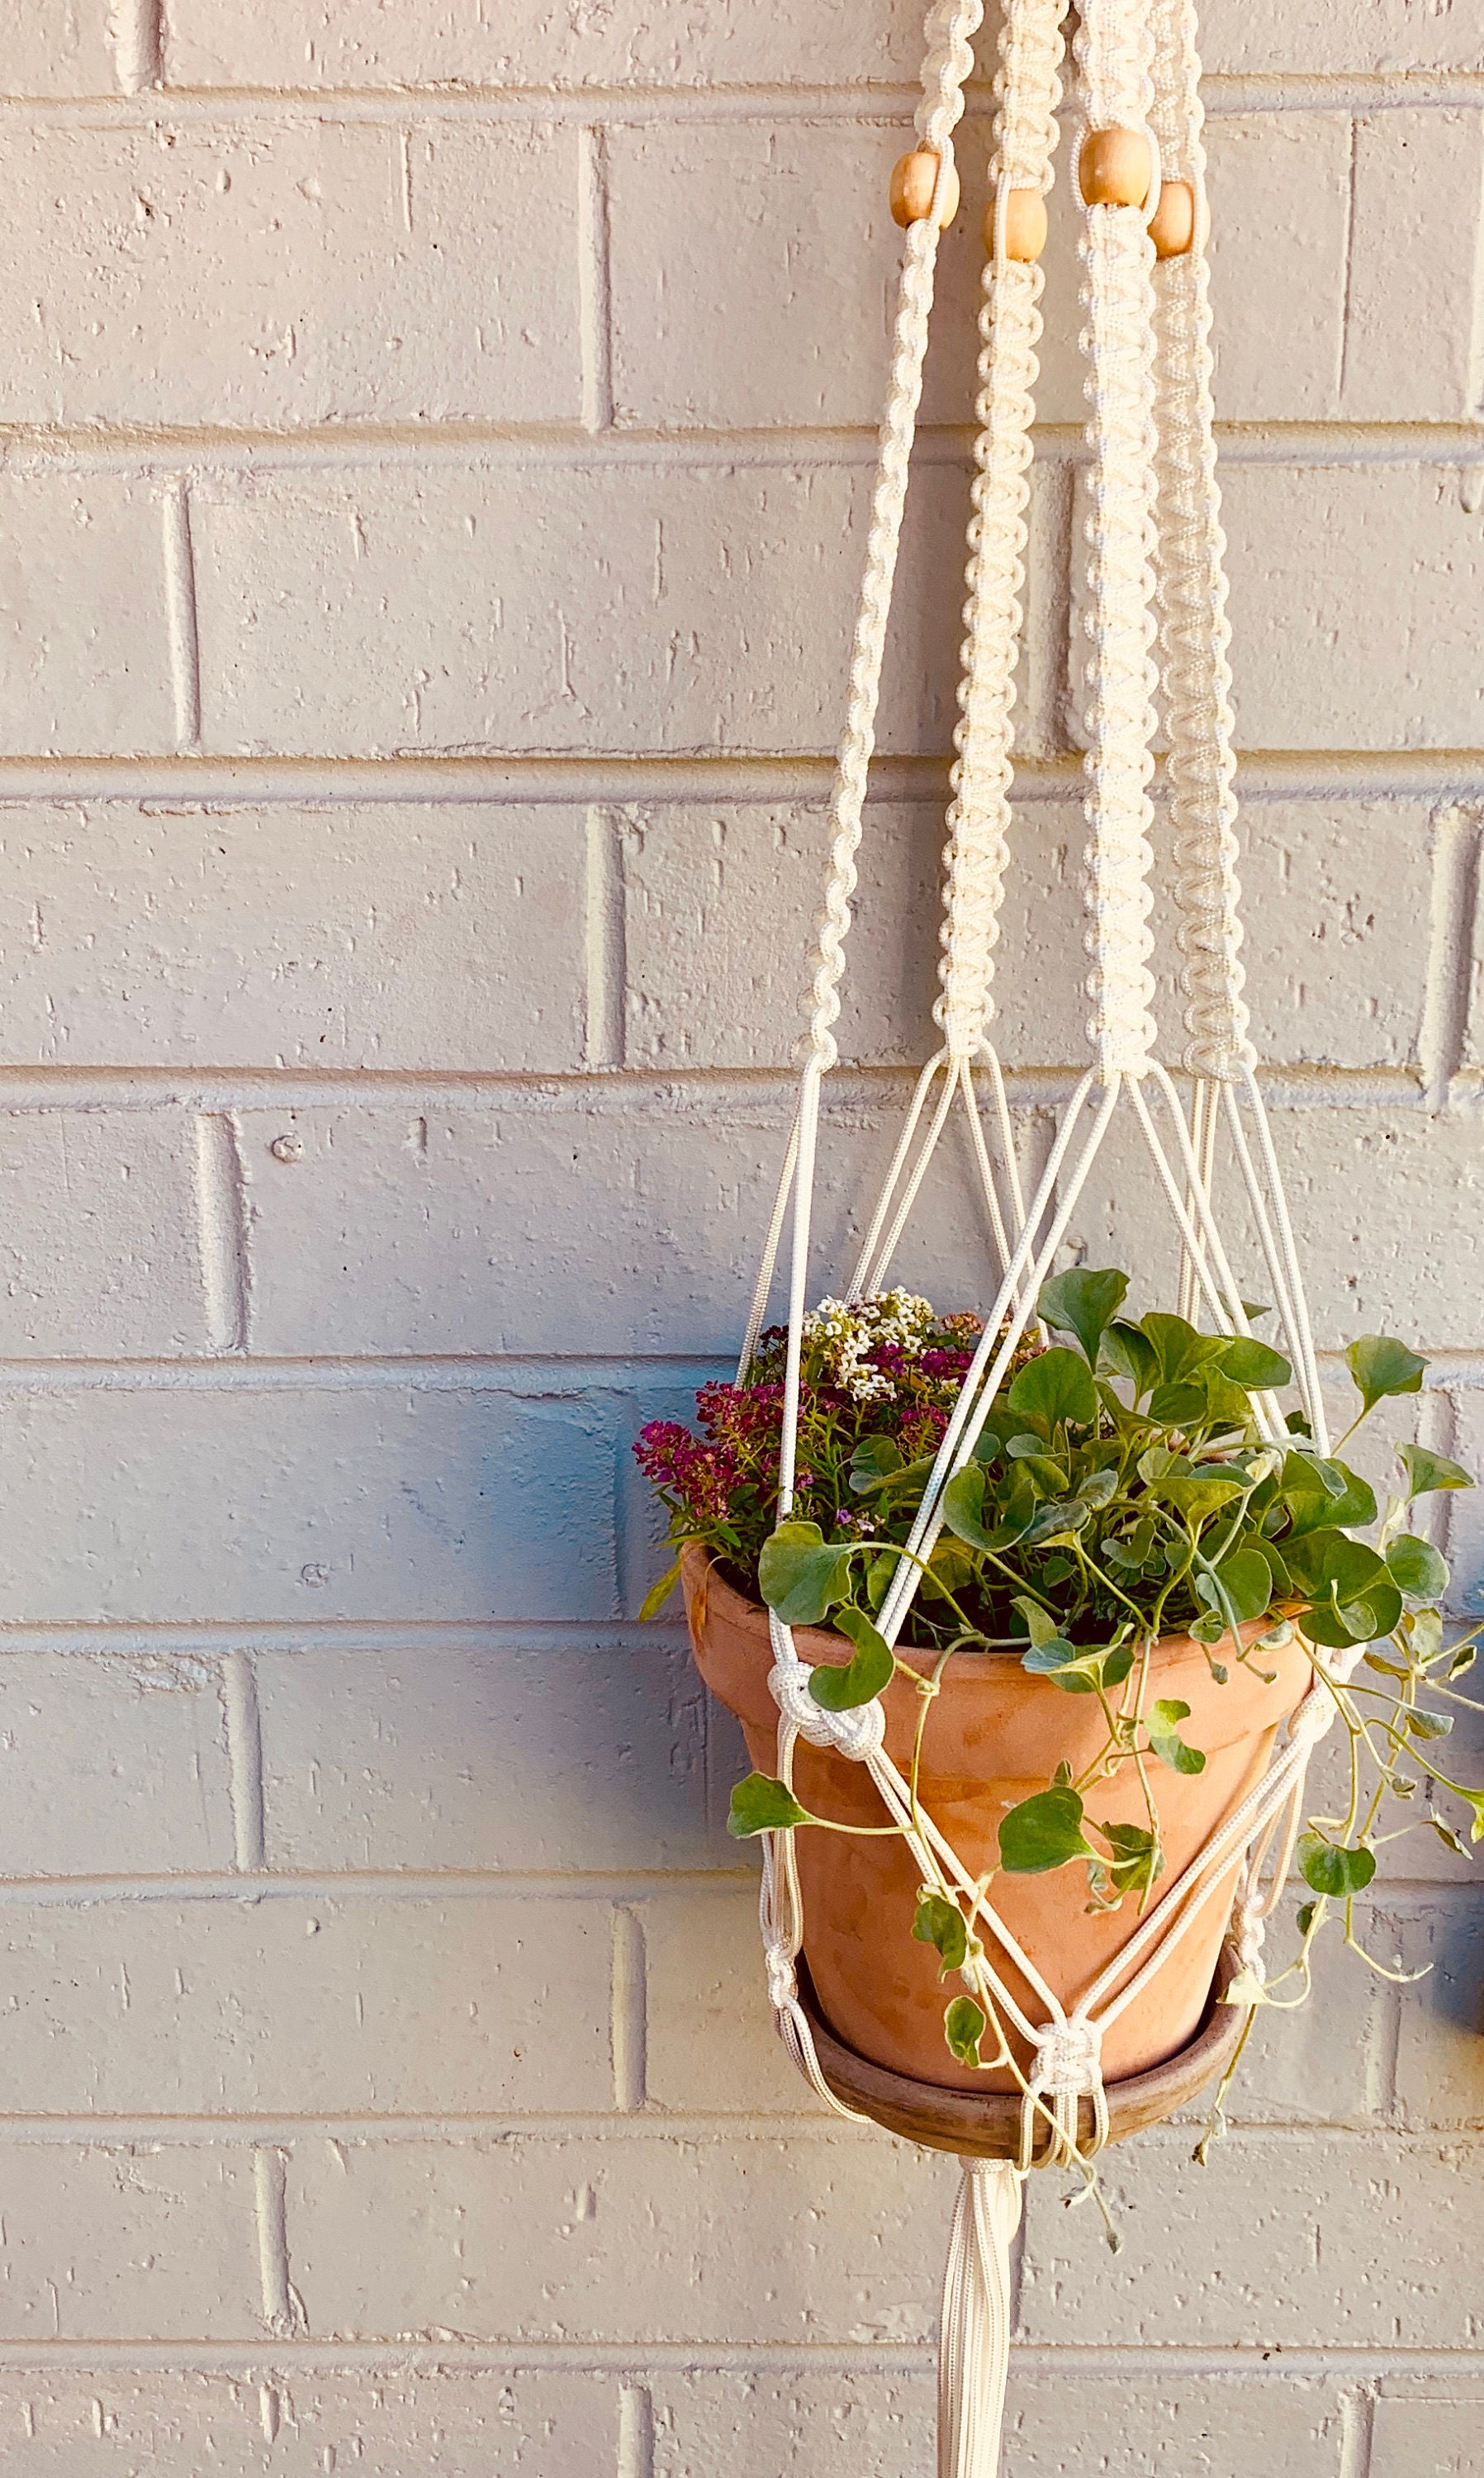
Learn how to make this beautiful macrame pot plant hanger with this step by step tutorial. It's an easy project and will be of the best effect in your home, it can also be a fantastic gift idea for your loved ones.
I will take you through each section of the hanger and explain each knot. There are tons of photos too so you can also visually see what I am talking about.
I really hope you enjoy this project! Feel free to leave a comment or shoot me a message if you have any question, if you're stuck somewhere making your hanger or simply if you want to leave a lovely positive message.
Kindly
Nic
DIY MACRAME POT PLANT HANGER - STEP BY STEP MANUAL
• Step 1: list of material
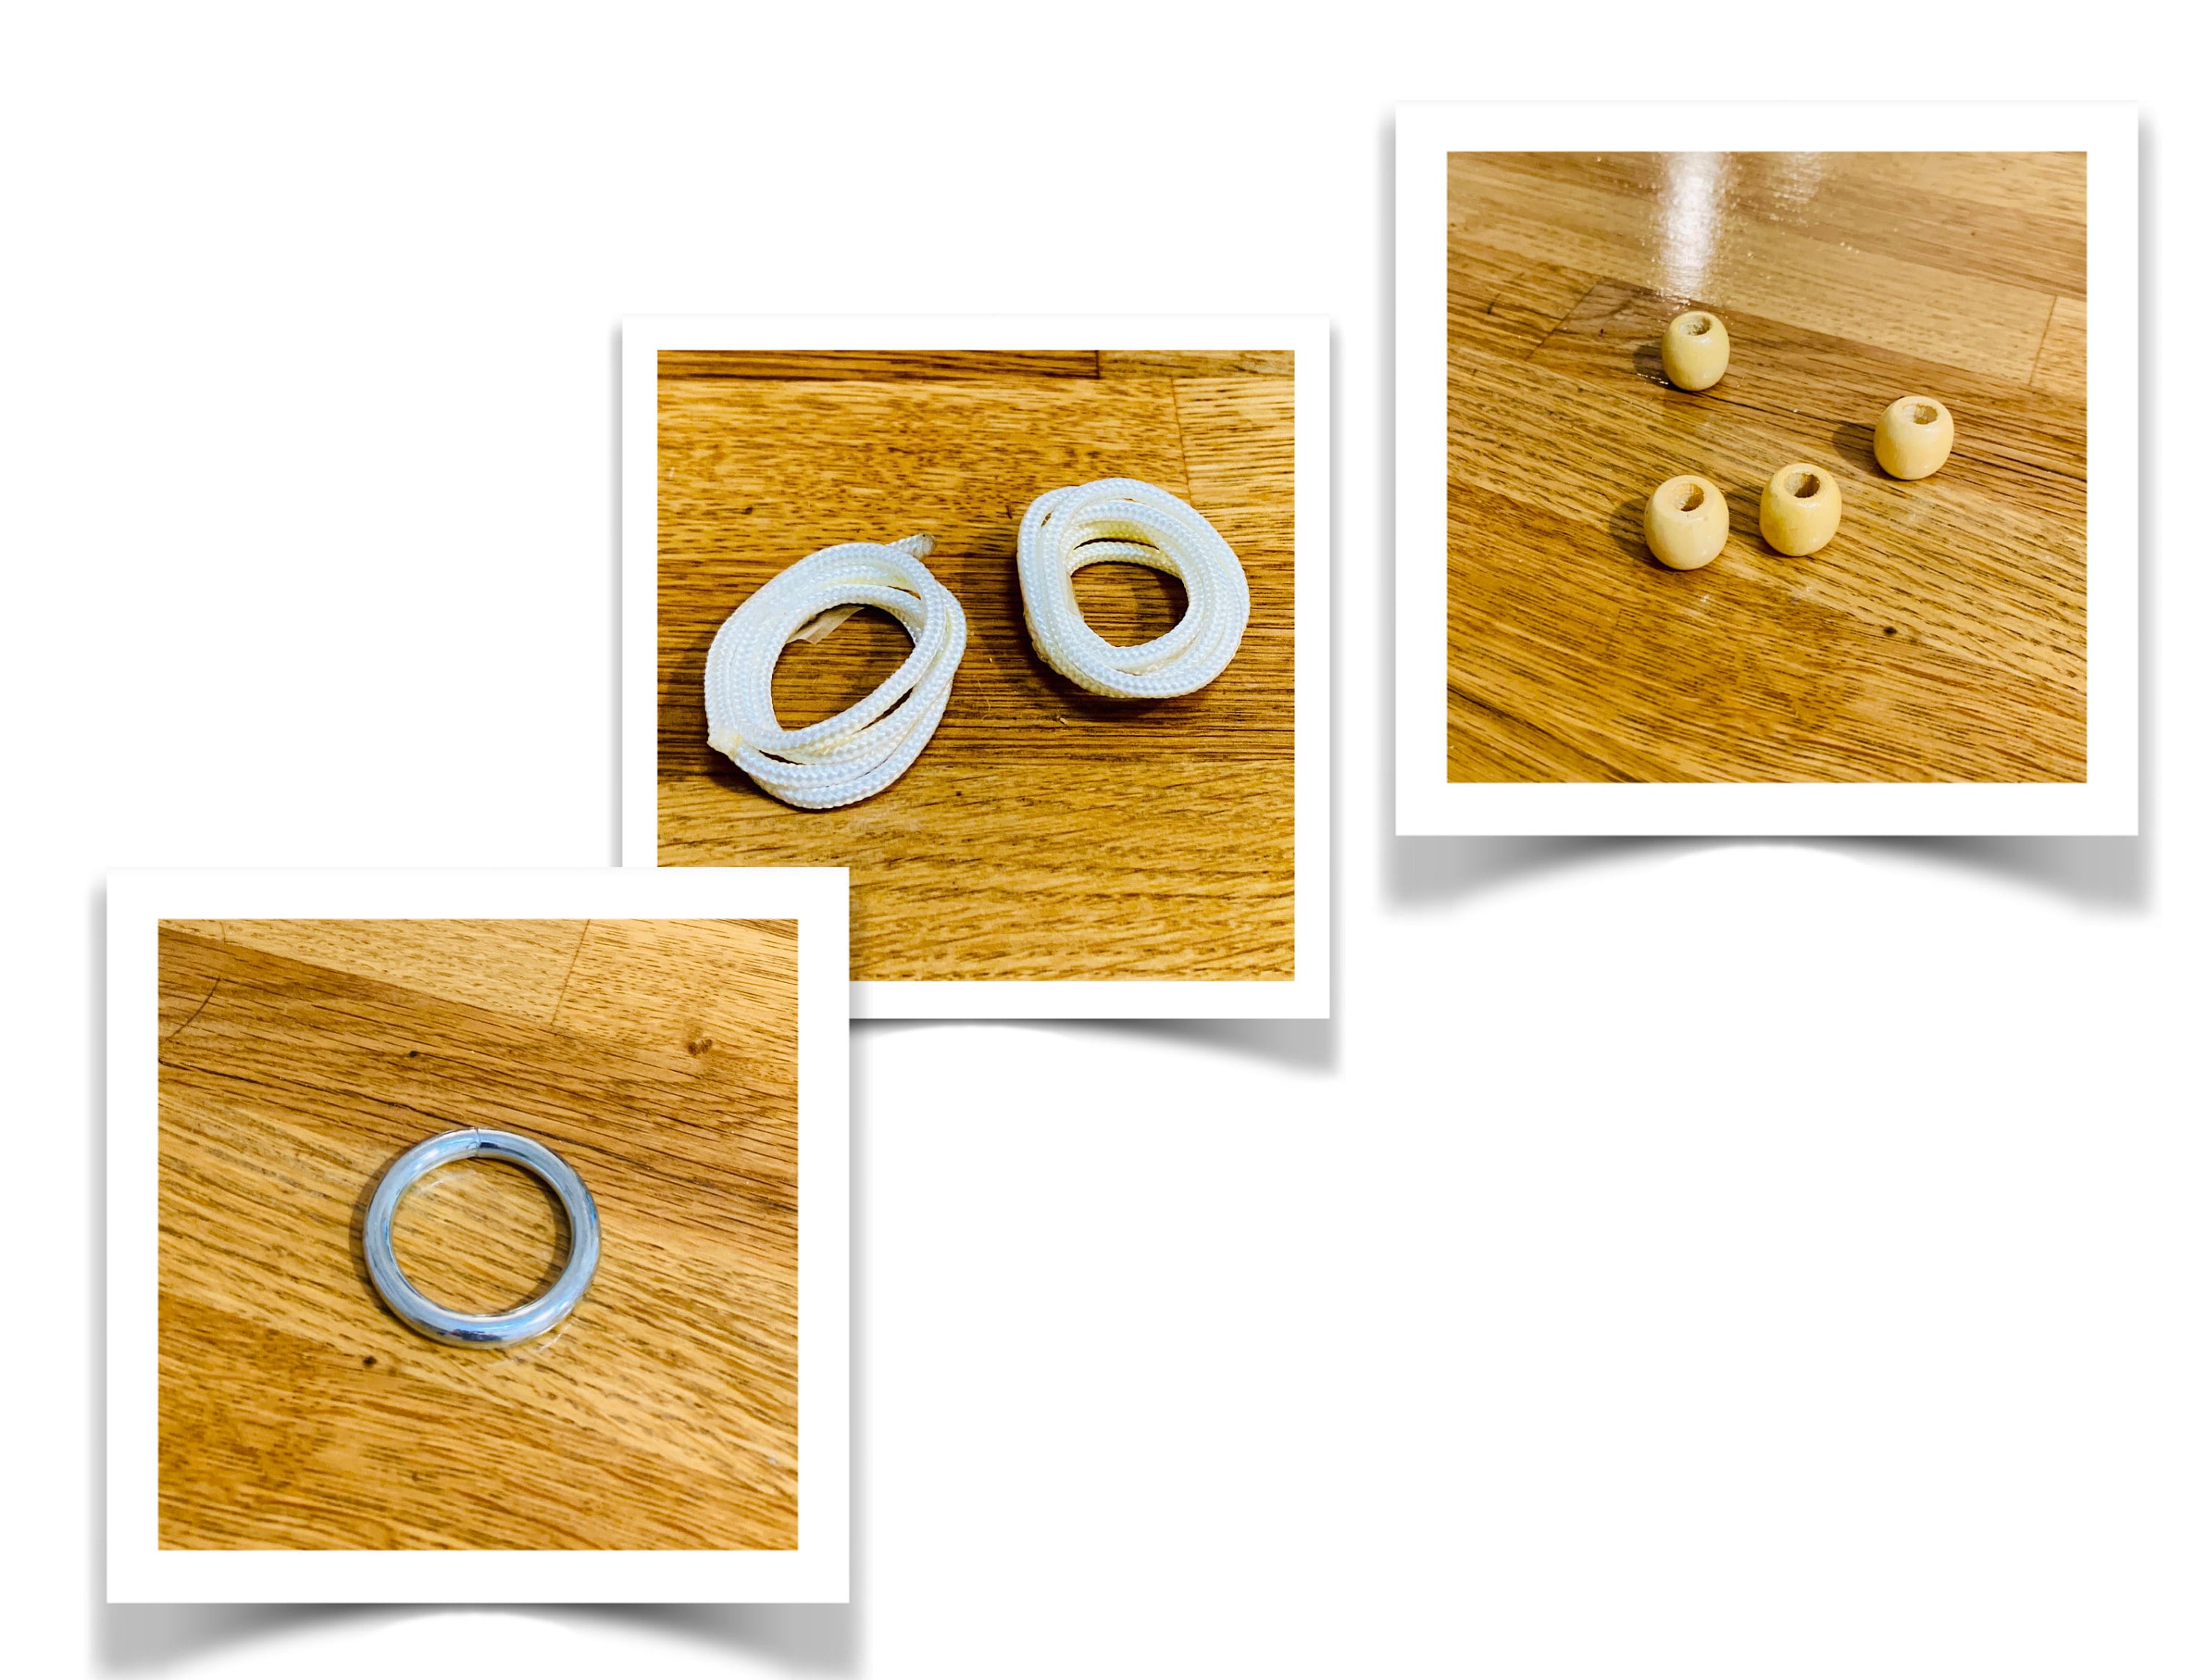
- 4x 600cm (6.5yd) cord - 4x 280cm (3yd) cord - 2x 50cm (in) cord (for the wrapped knots) - 1x metal ring - 4x wooden beads
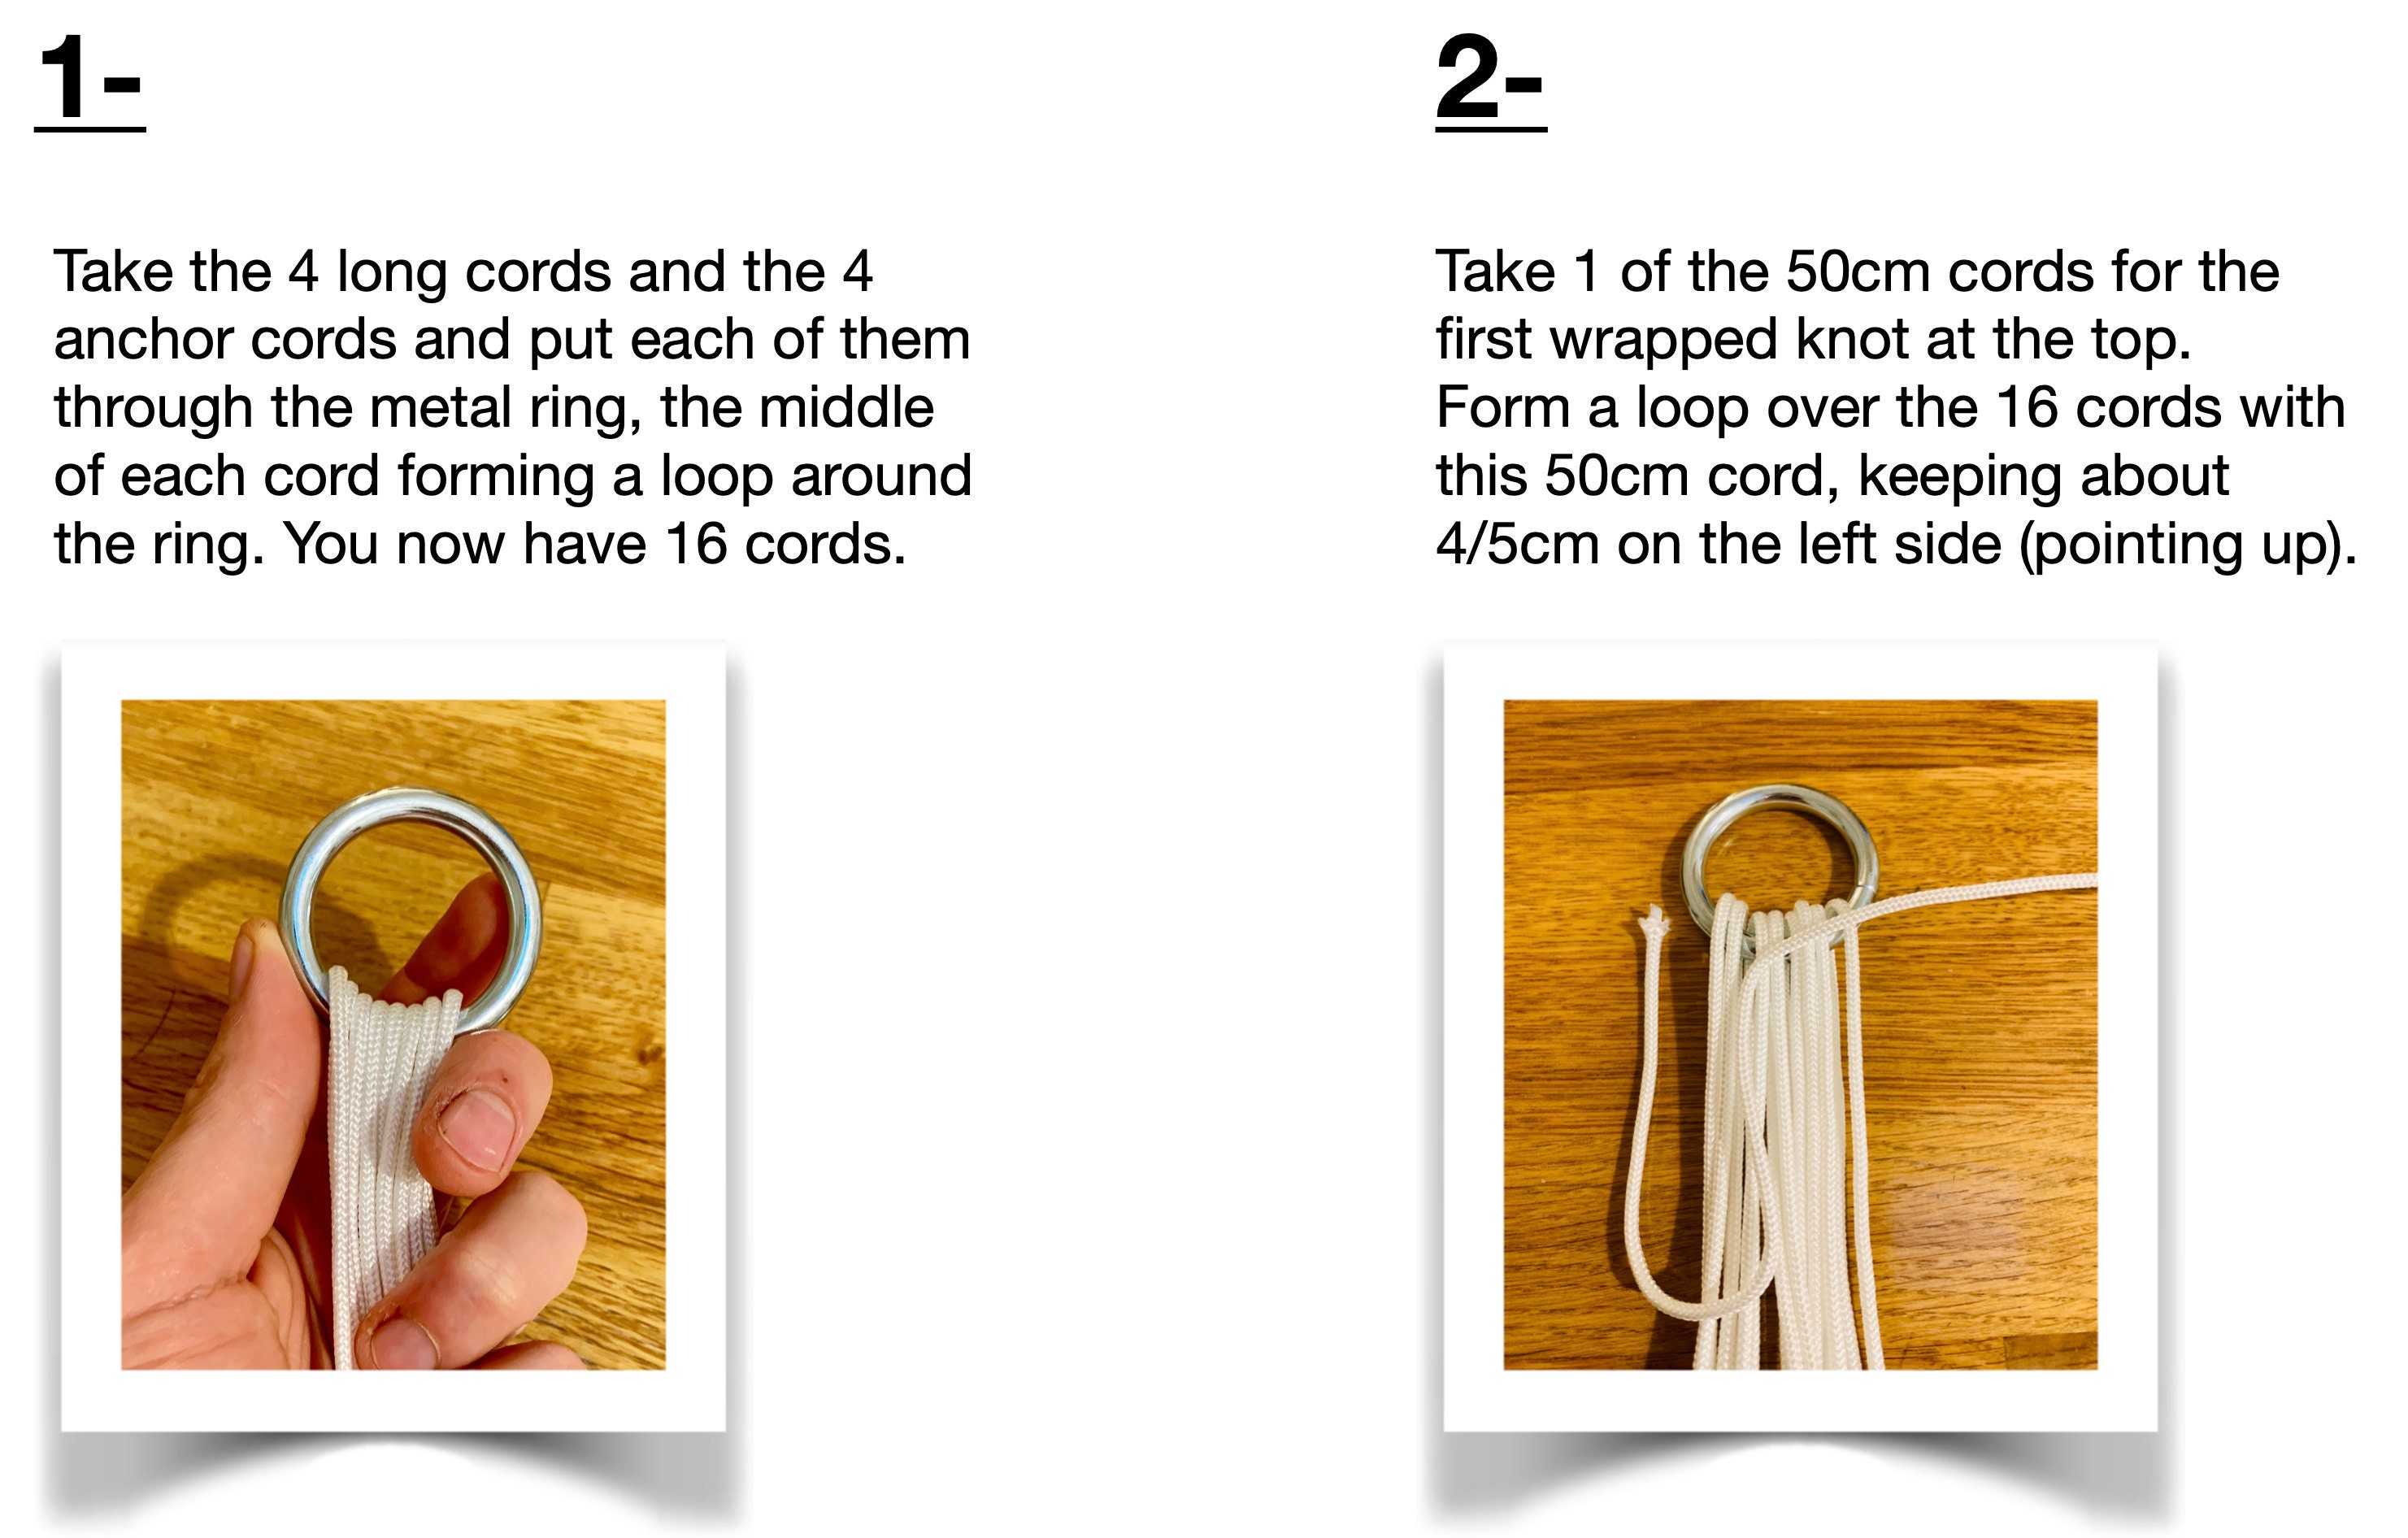
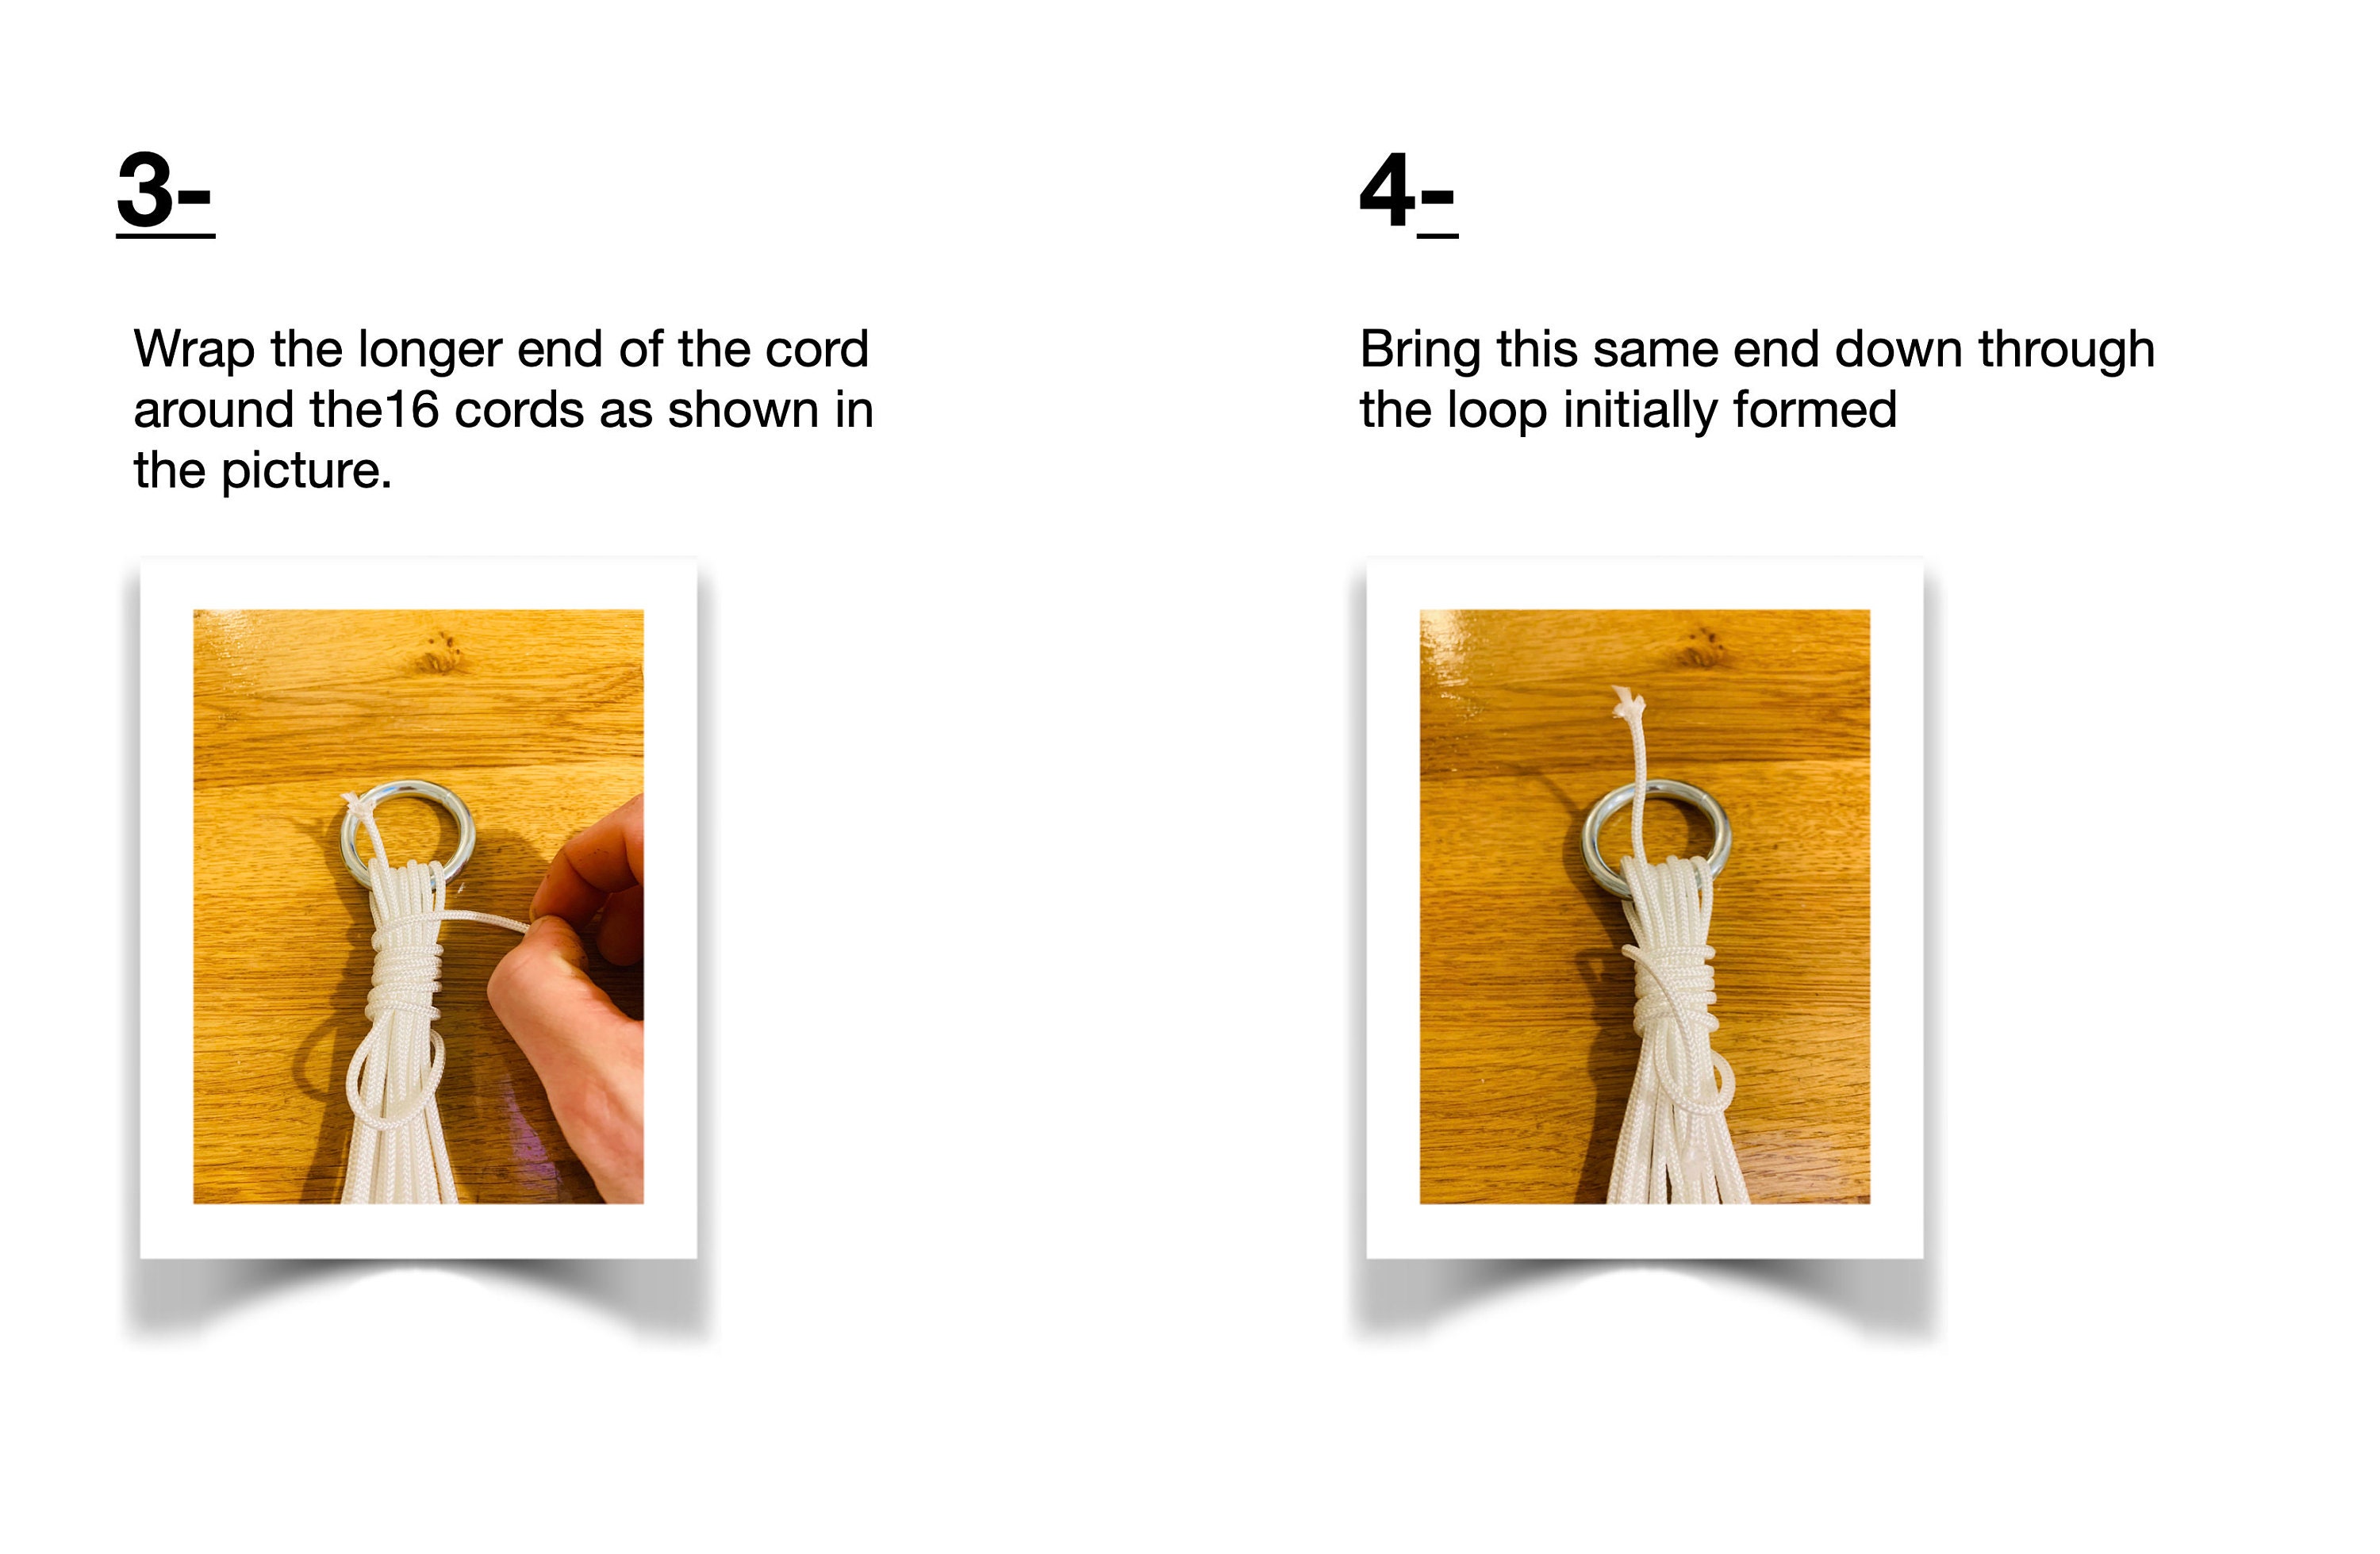
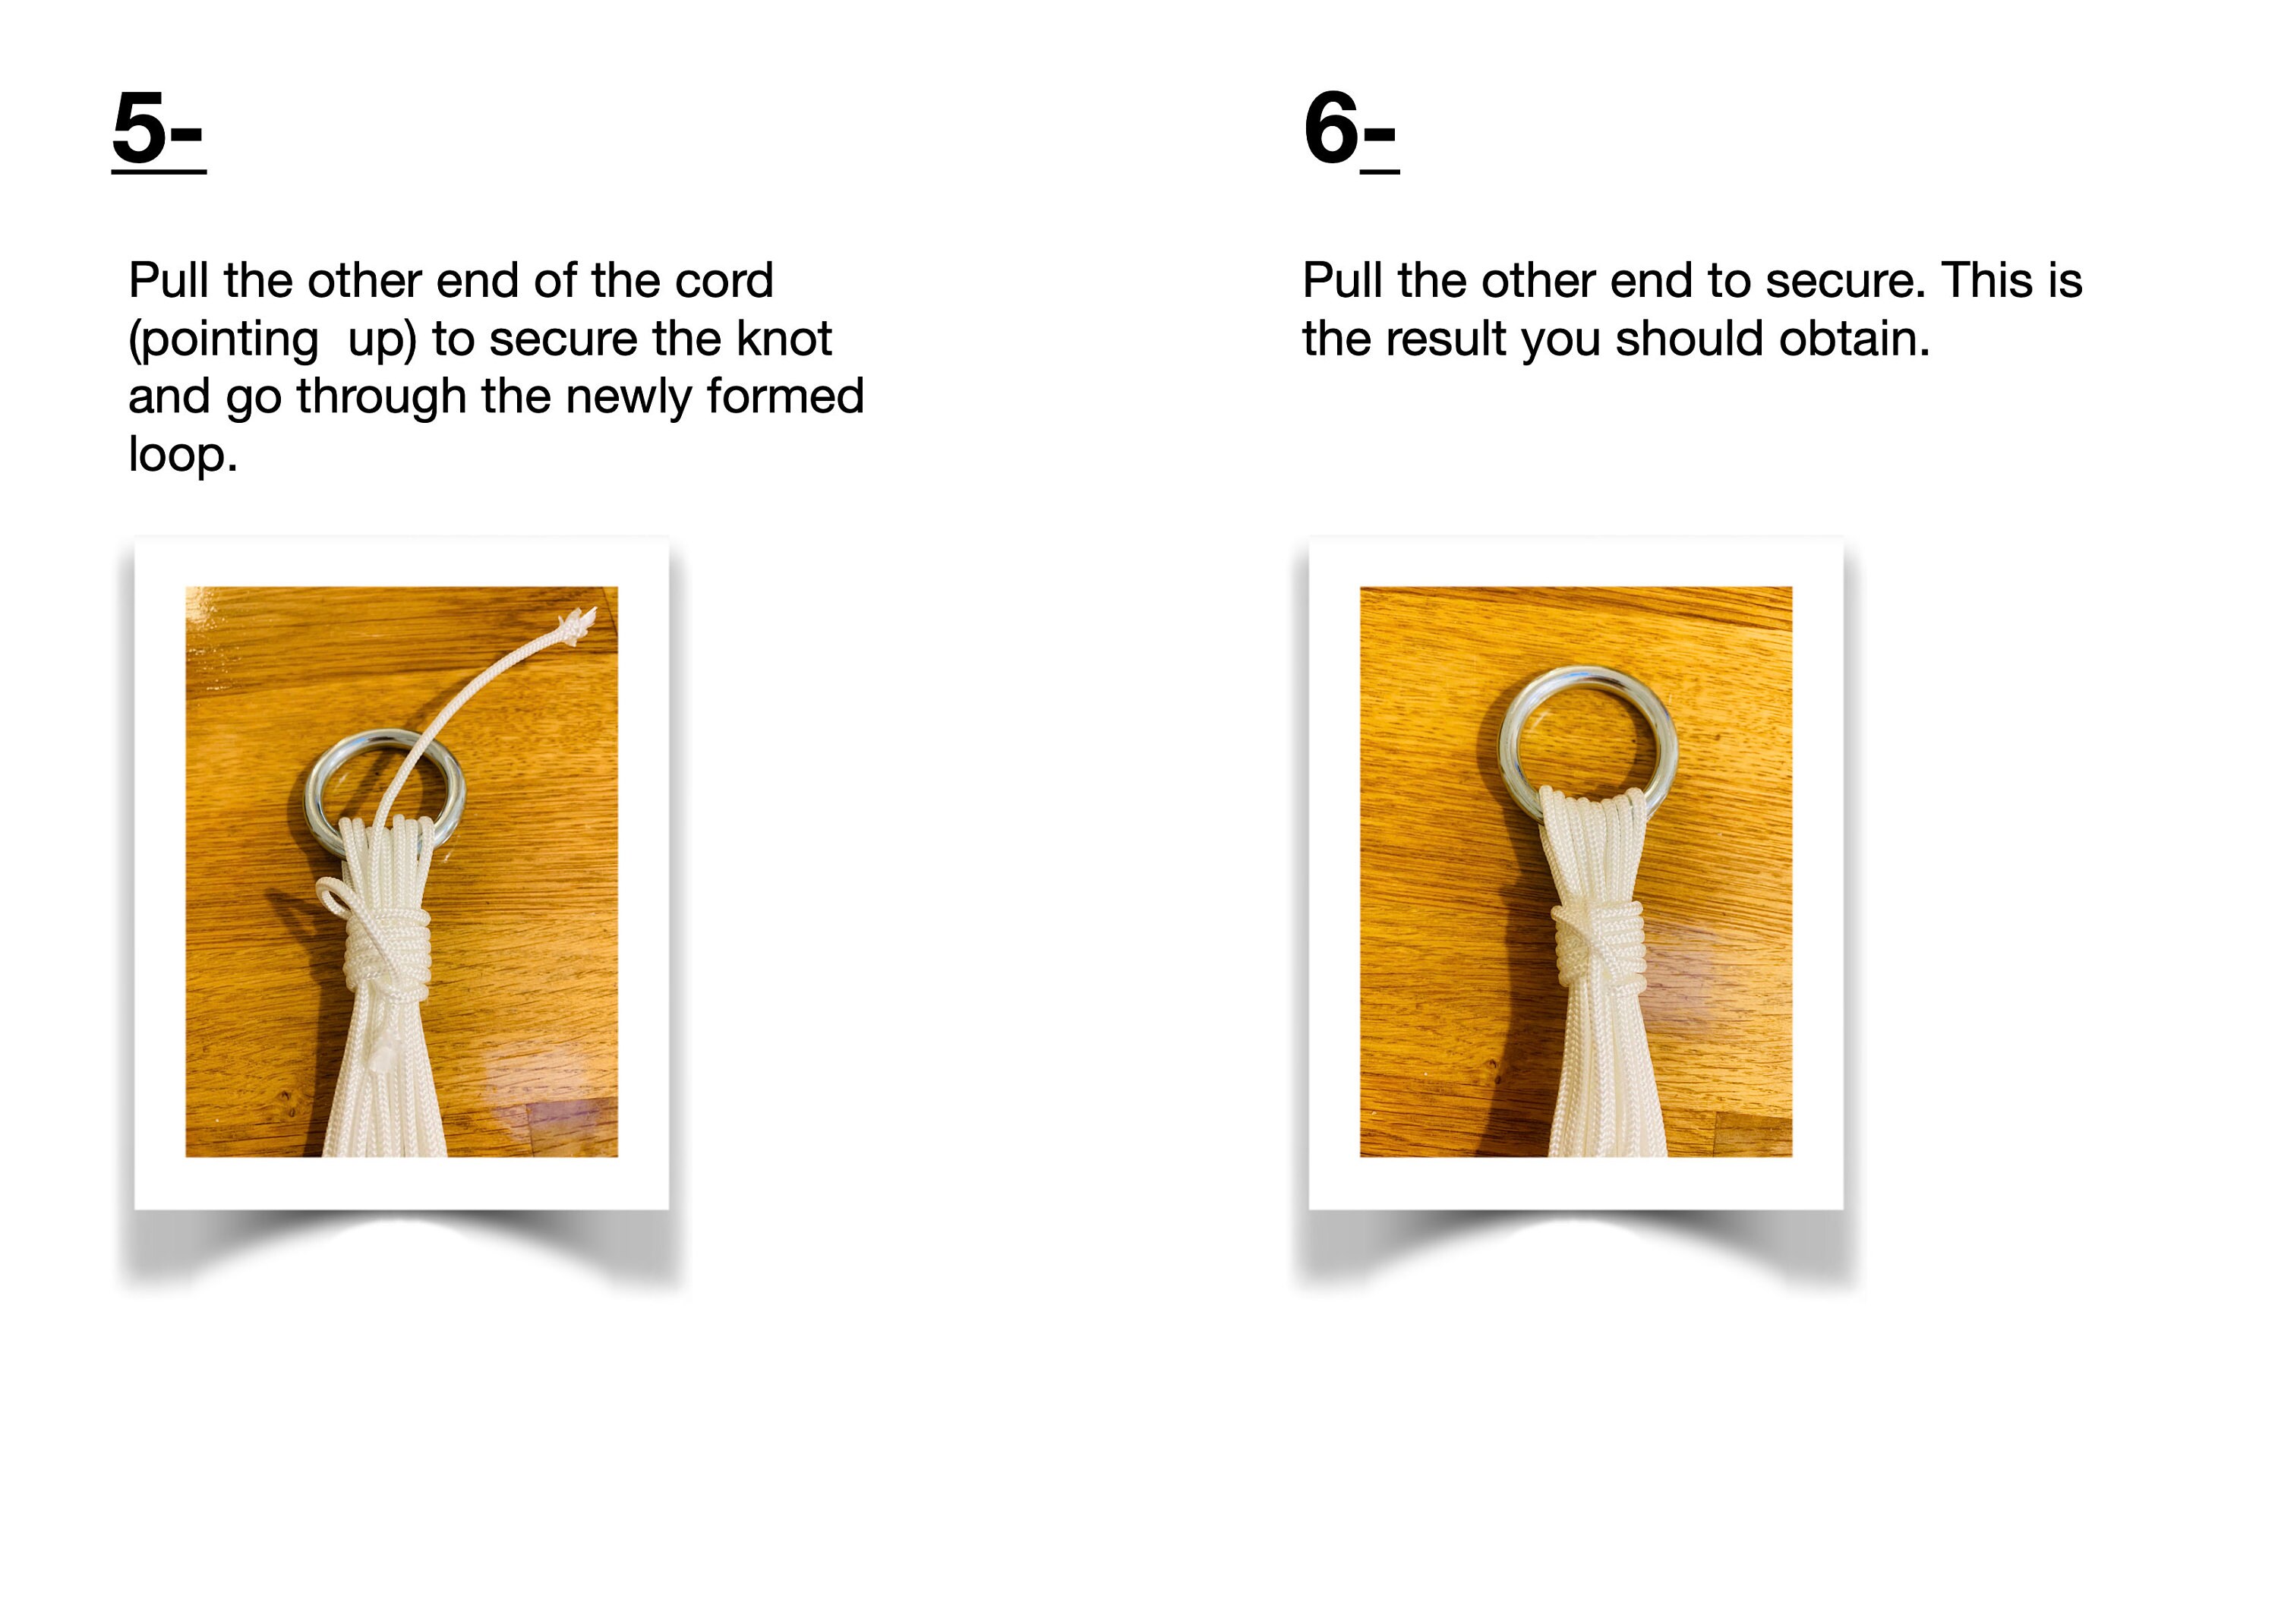
• Step 2: top wrapped knot
At the beginning, the cords are going to be long and it can get a little tricky; I recommend you secure the ring to a hook, door handle, window handle, etc... it will take some frustration away and insure your knots are consistent throughout the project.

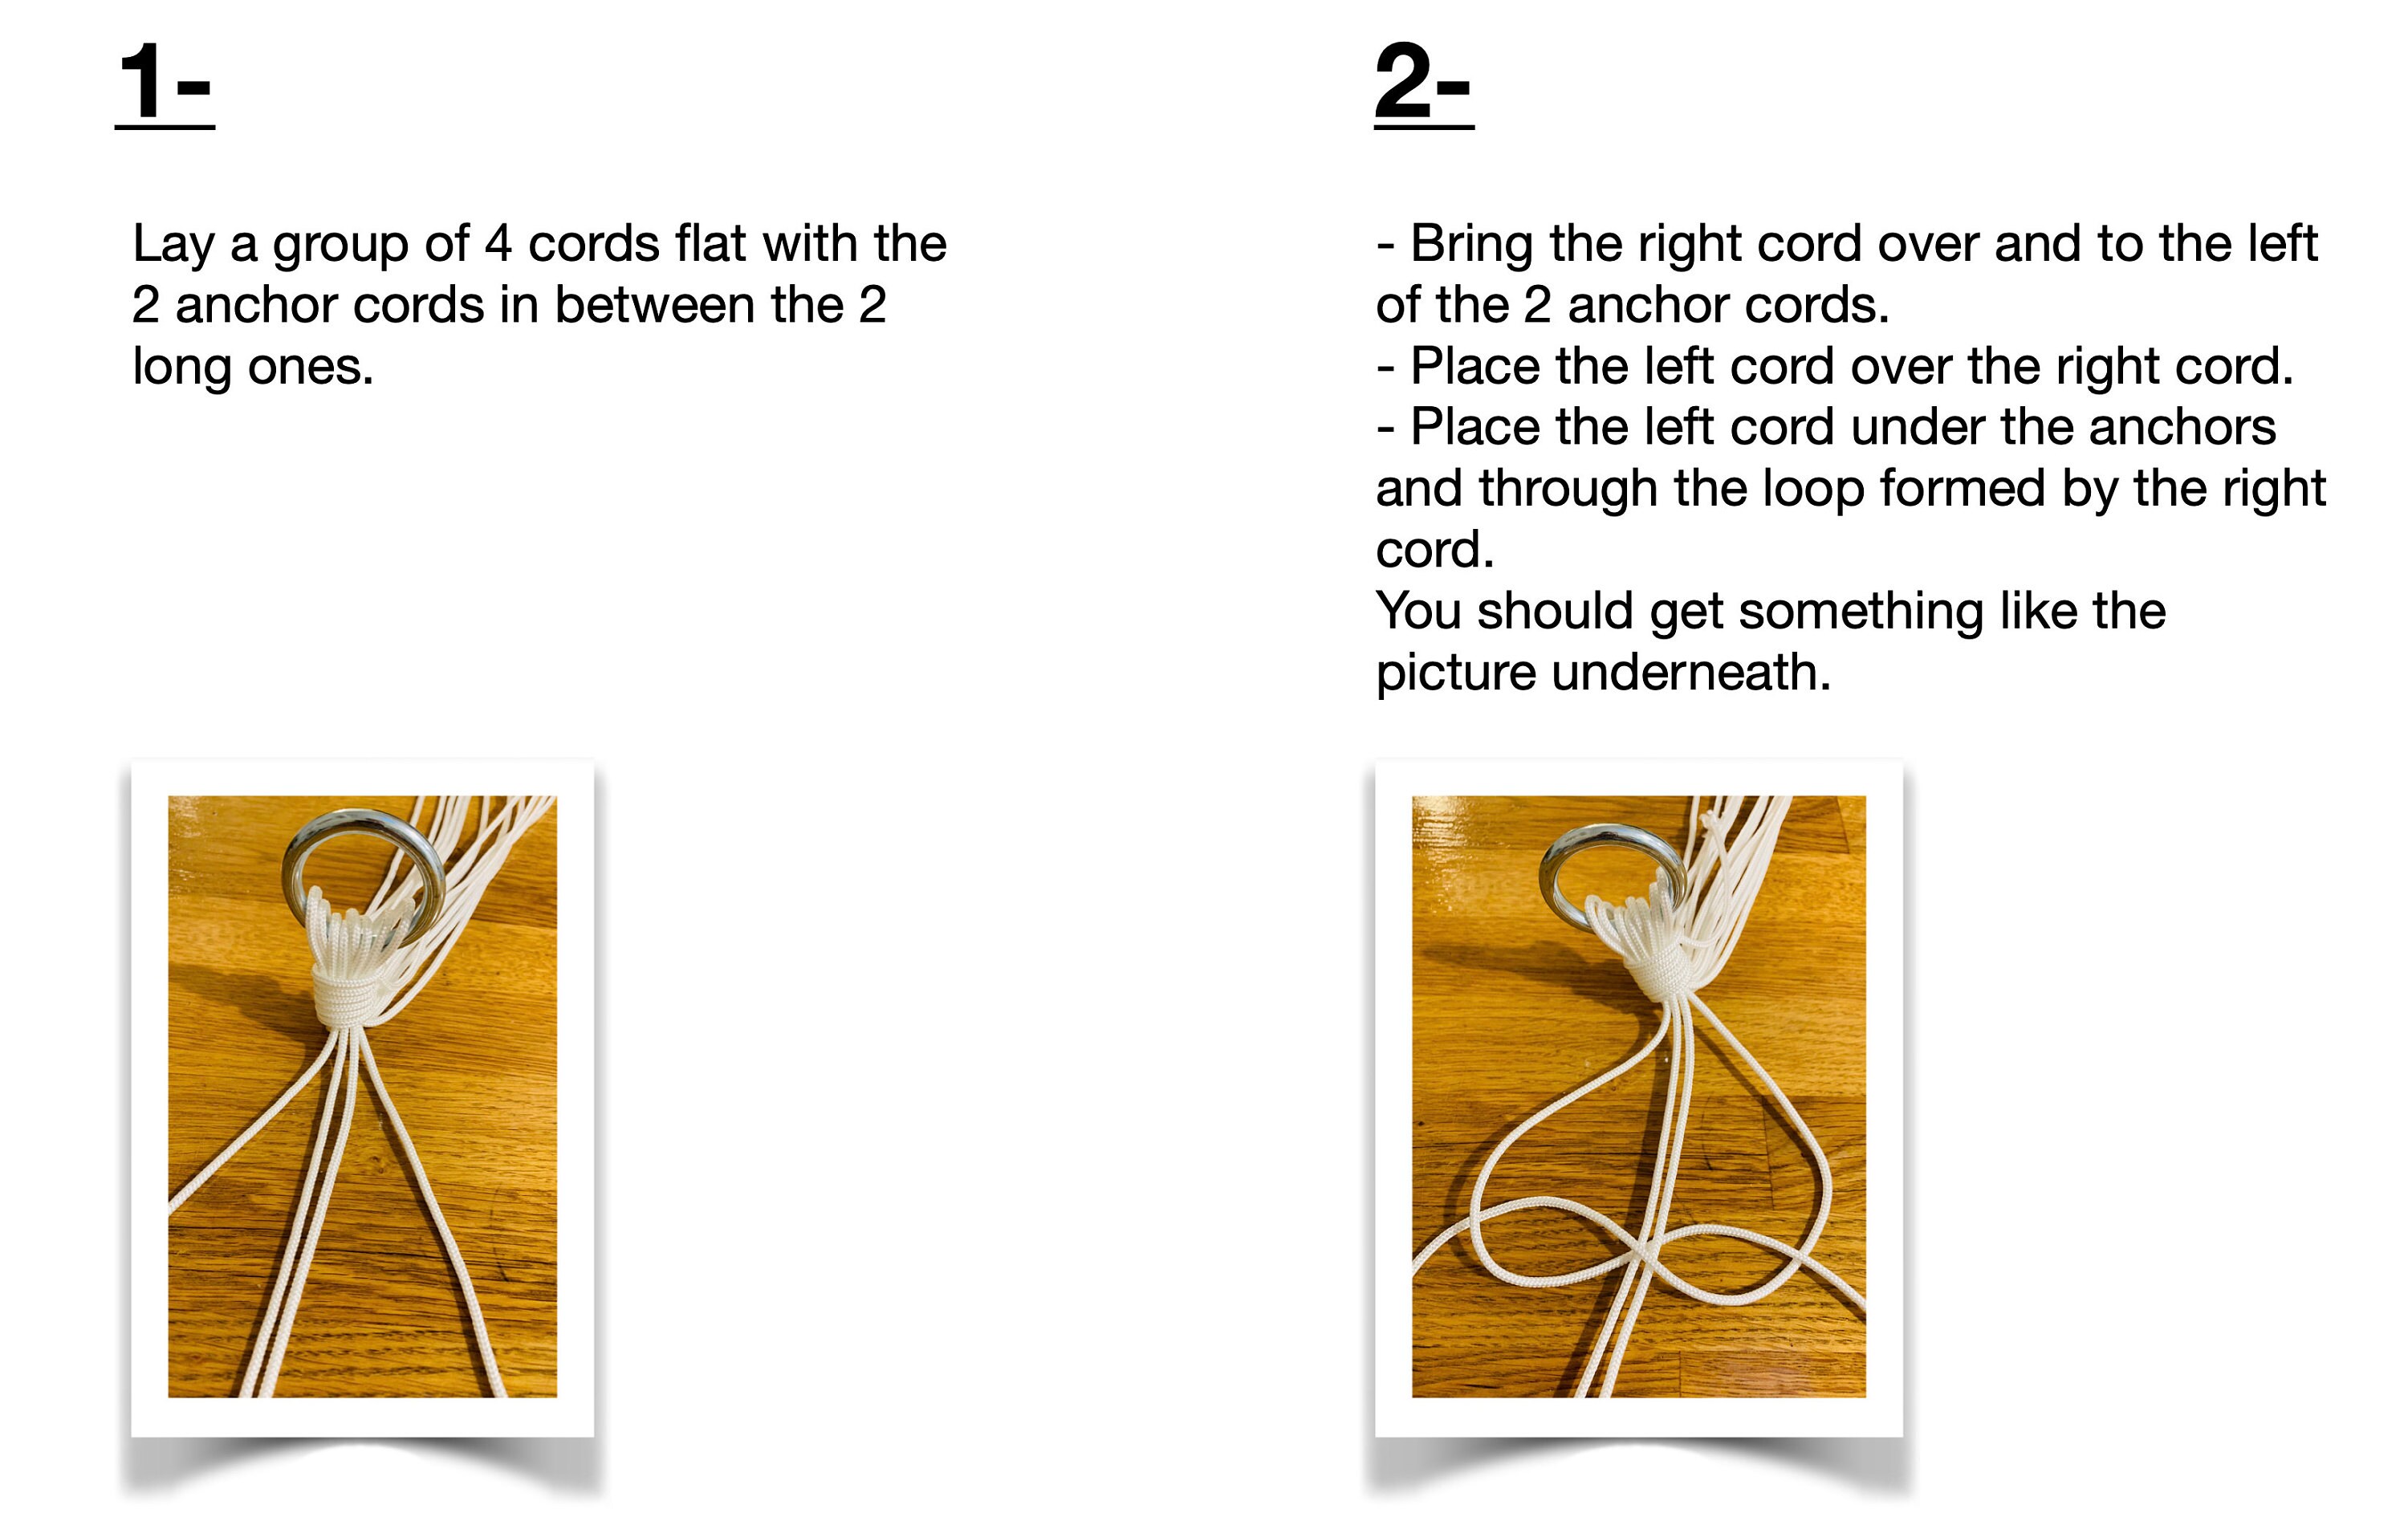
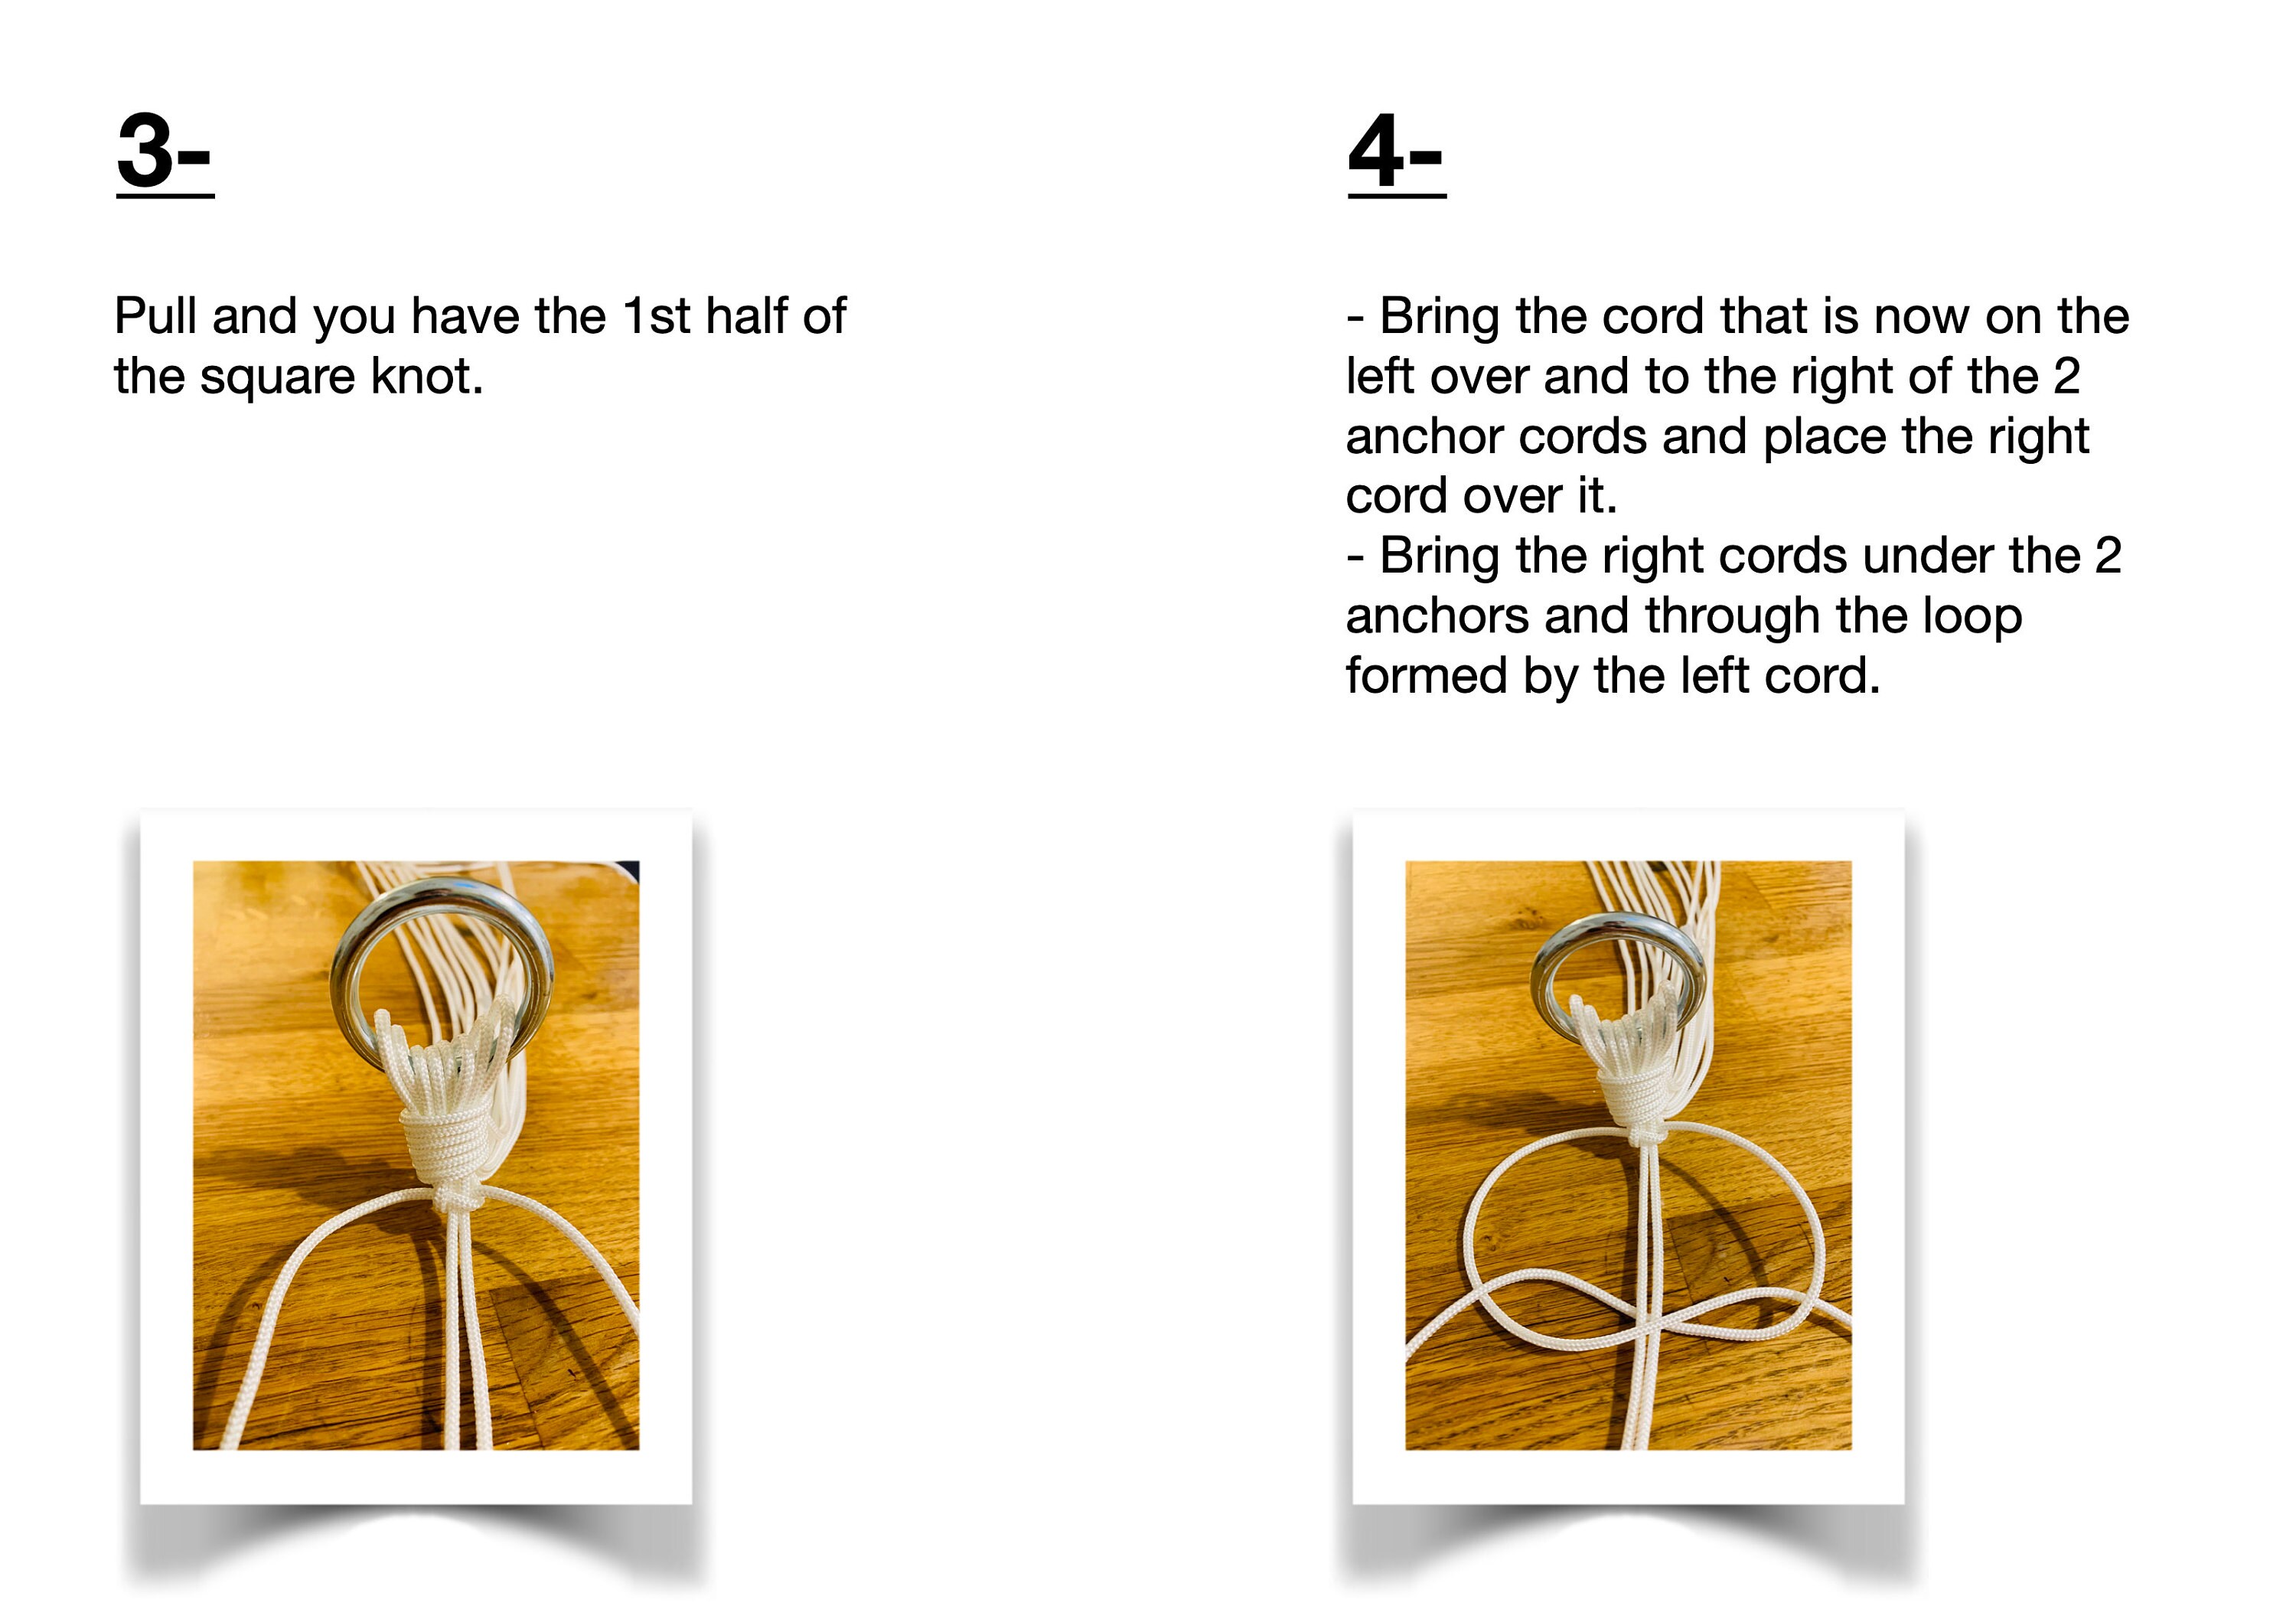
• Step 3: First row of square knots
You will now have to form 4 groups of 4 cords: 2 long cords and 2 anchor cords each time.
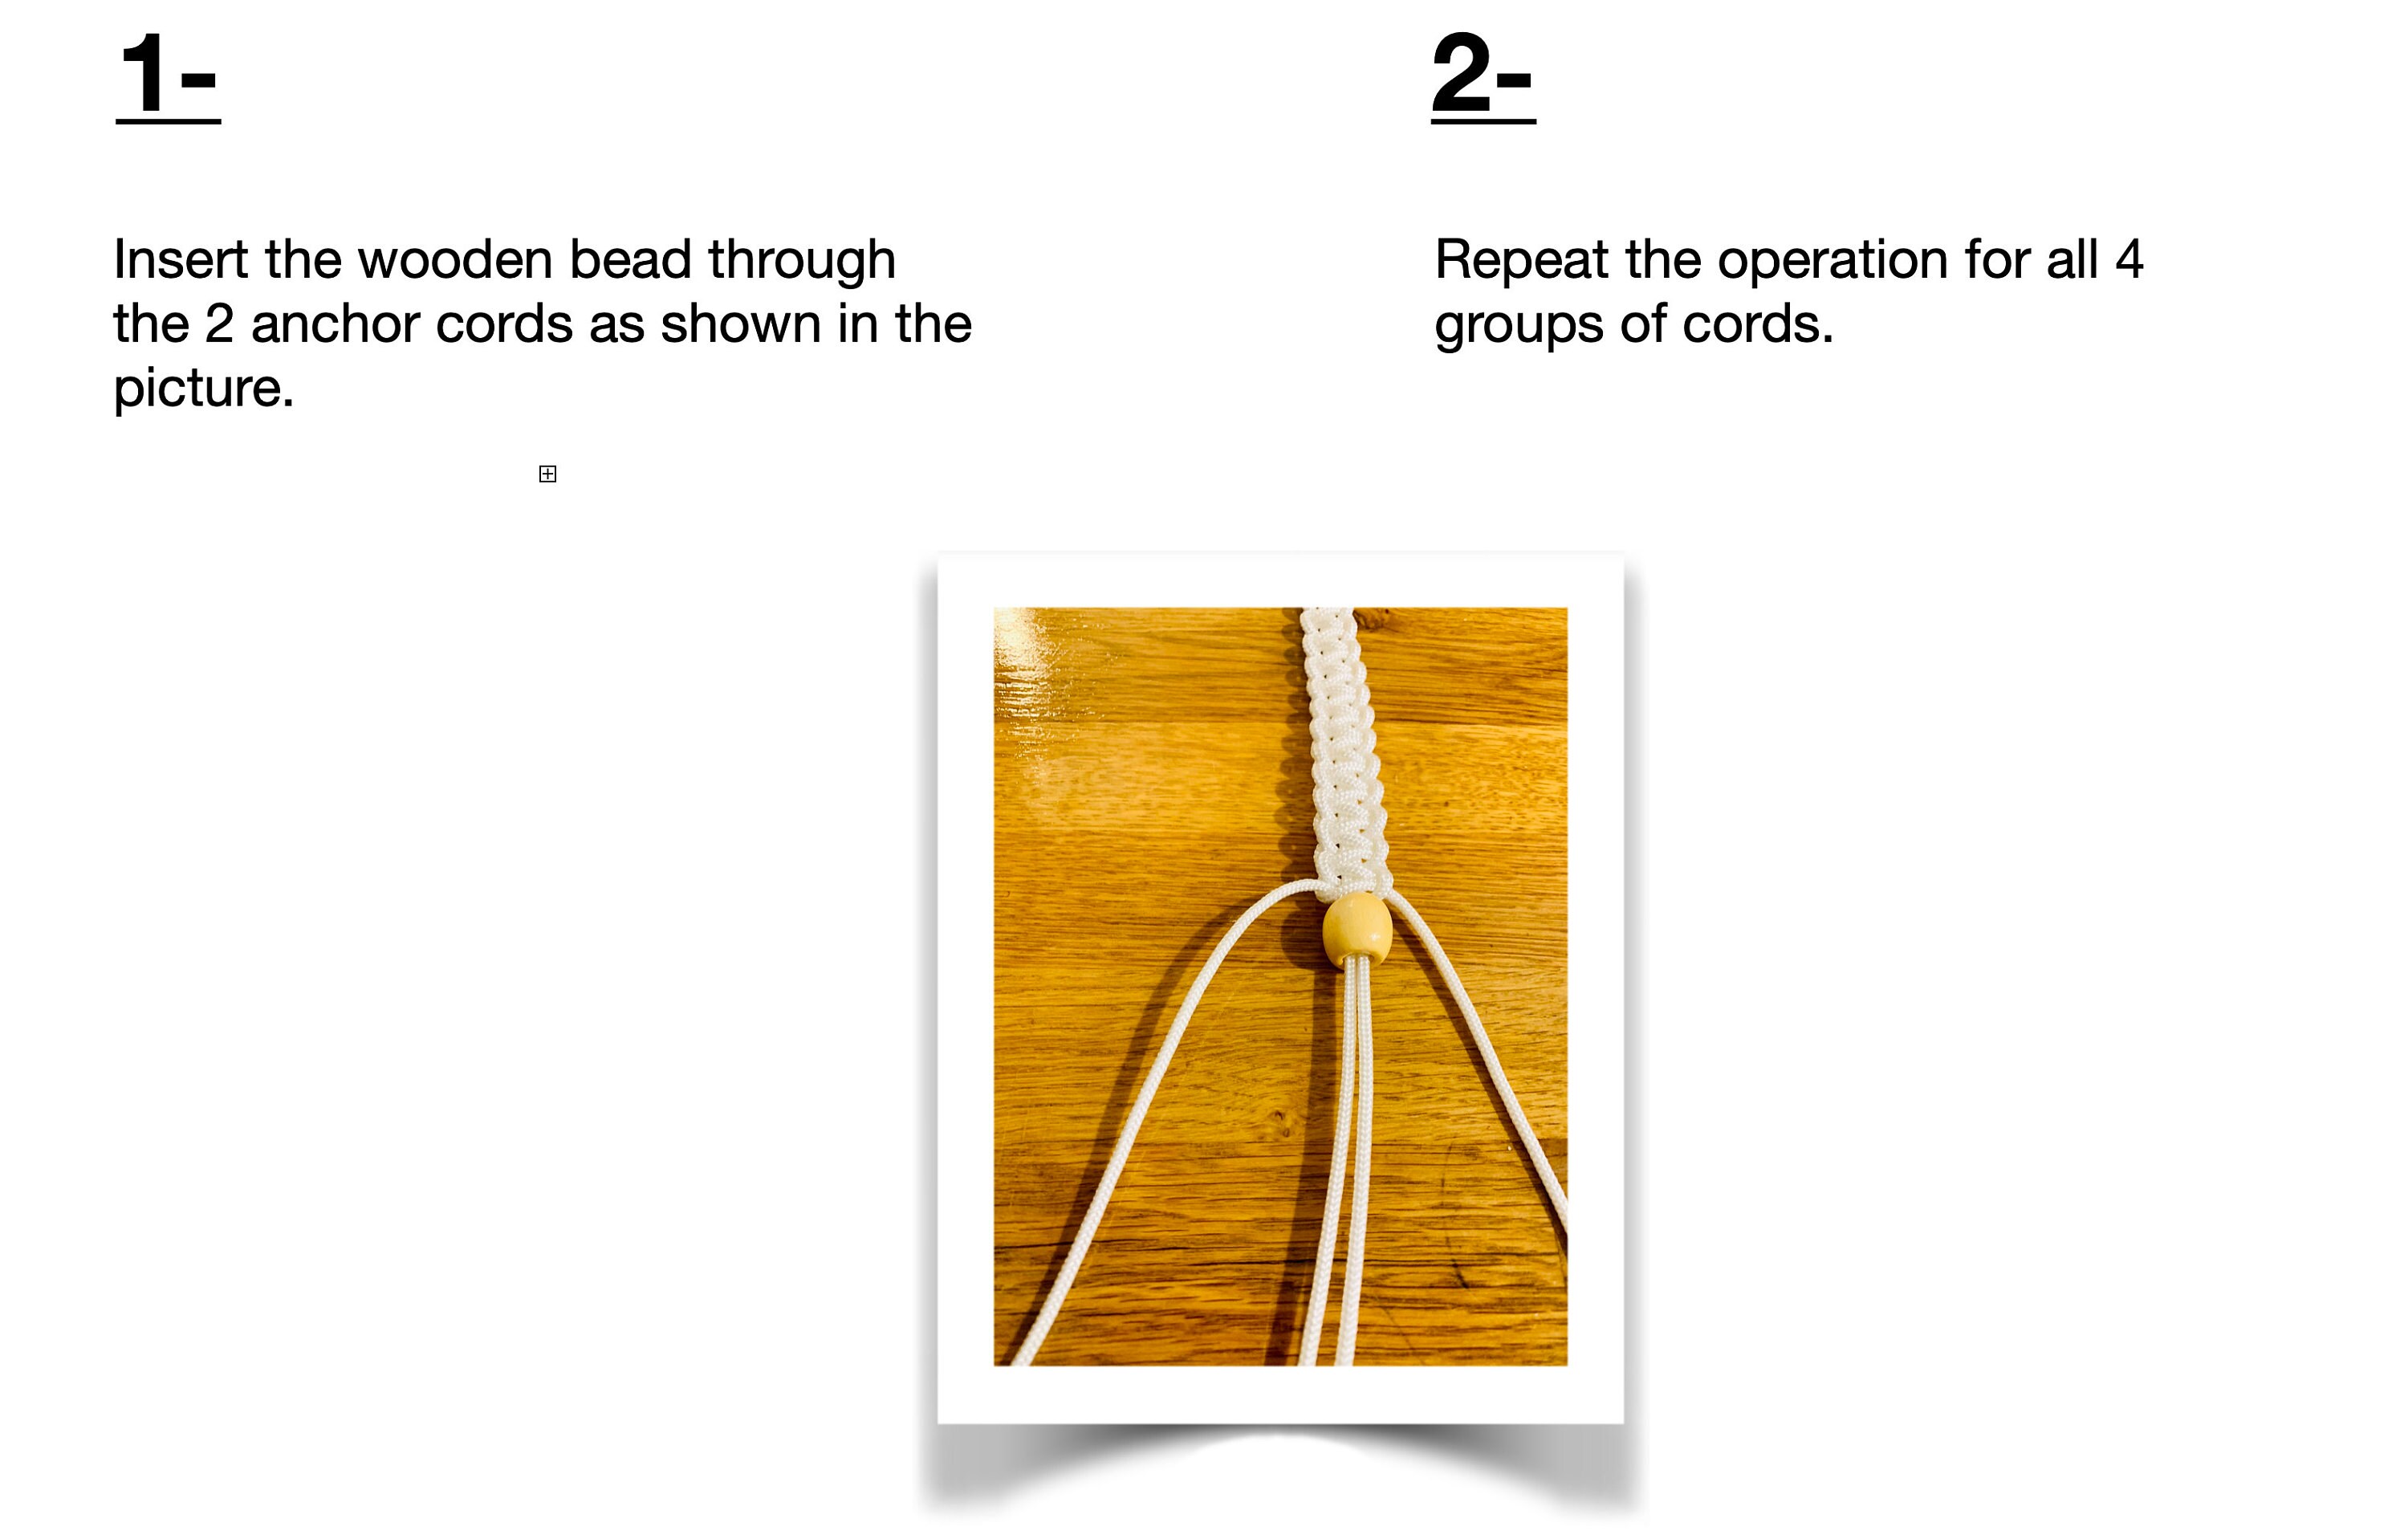
• Step 4: wooden beads
It’s now time to incorporate the beads into your macrame project.
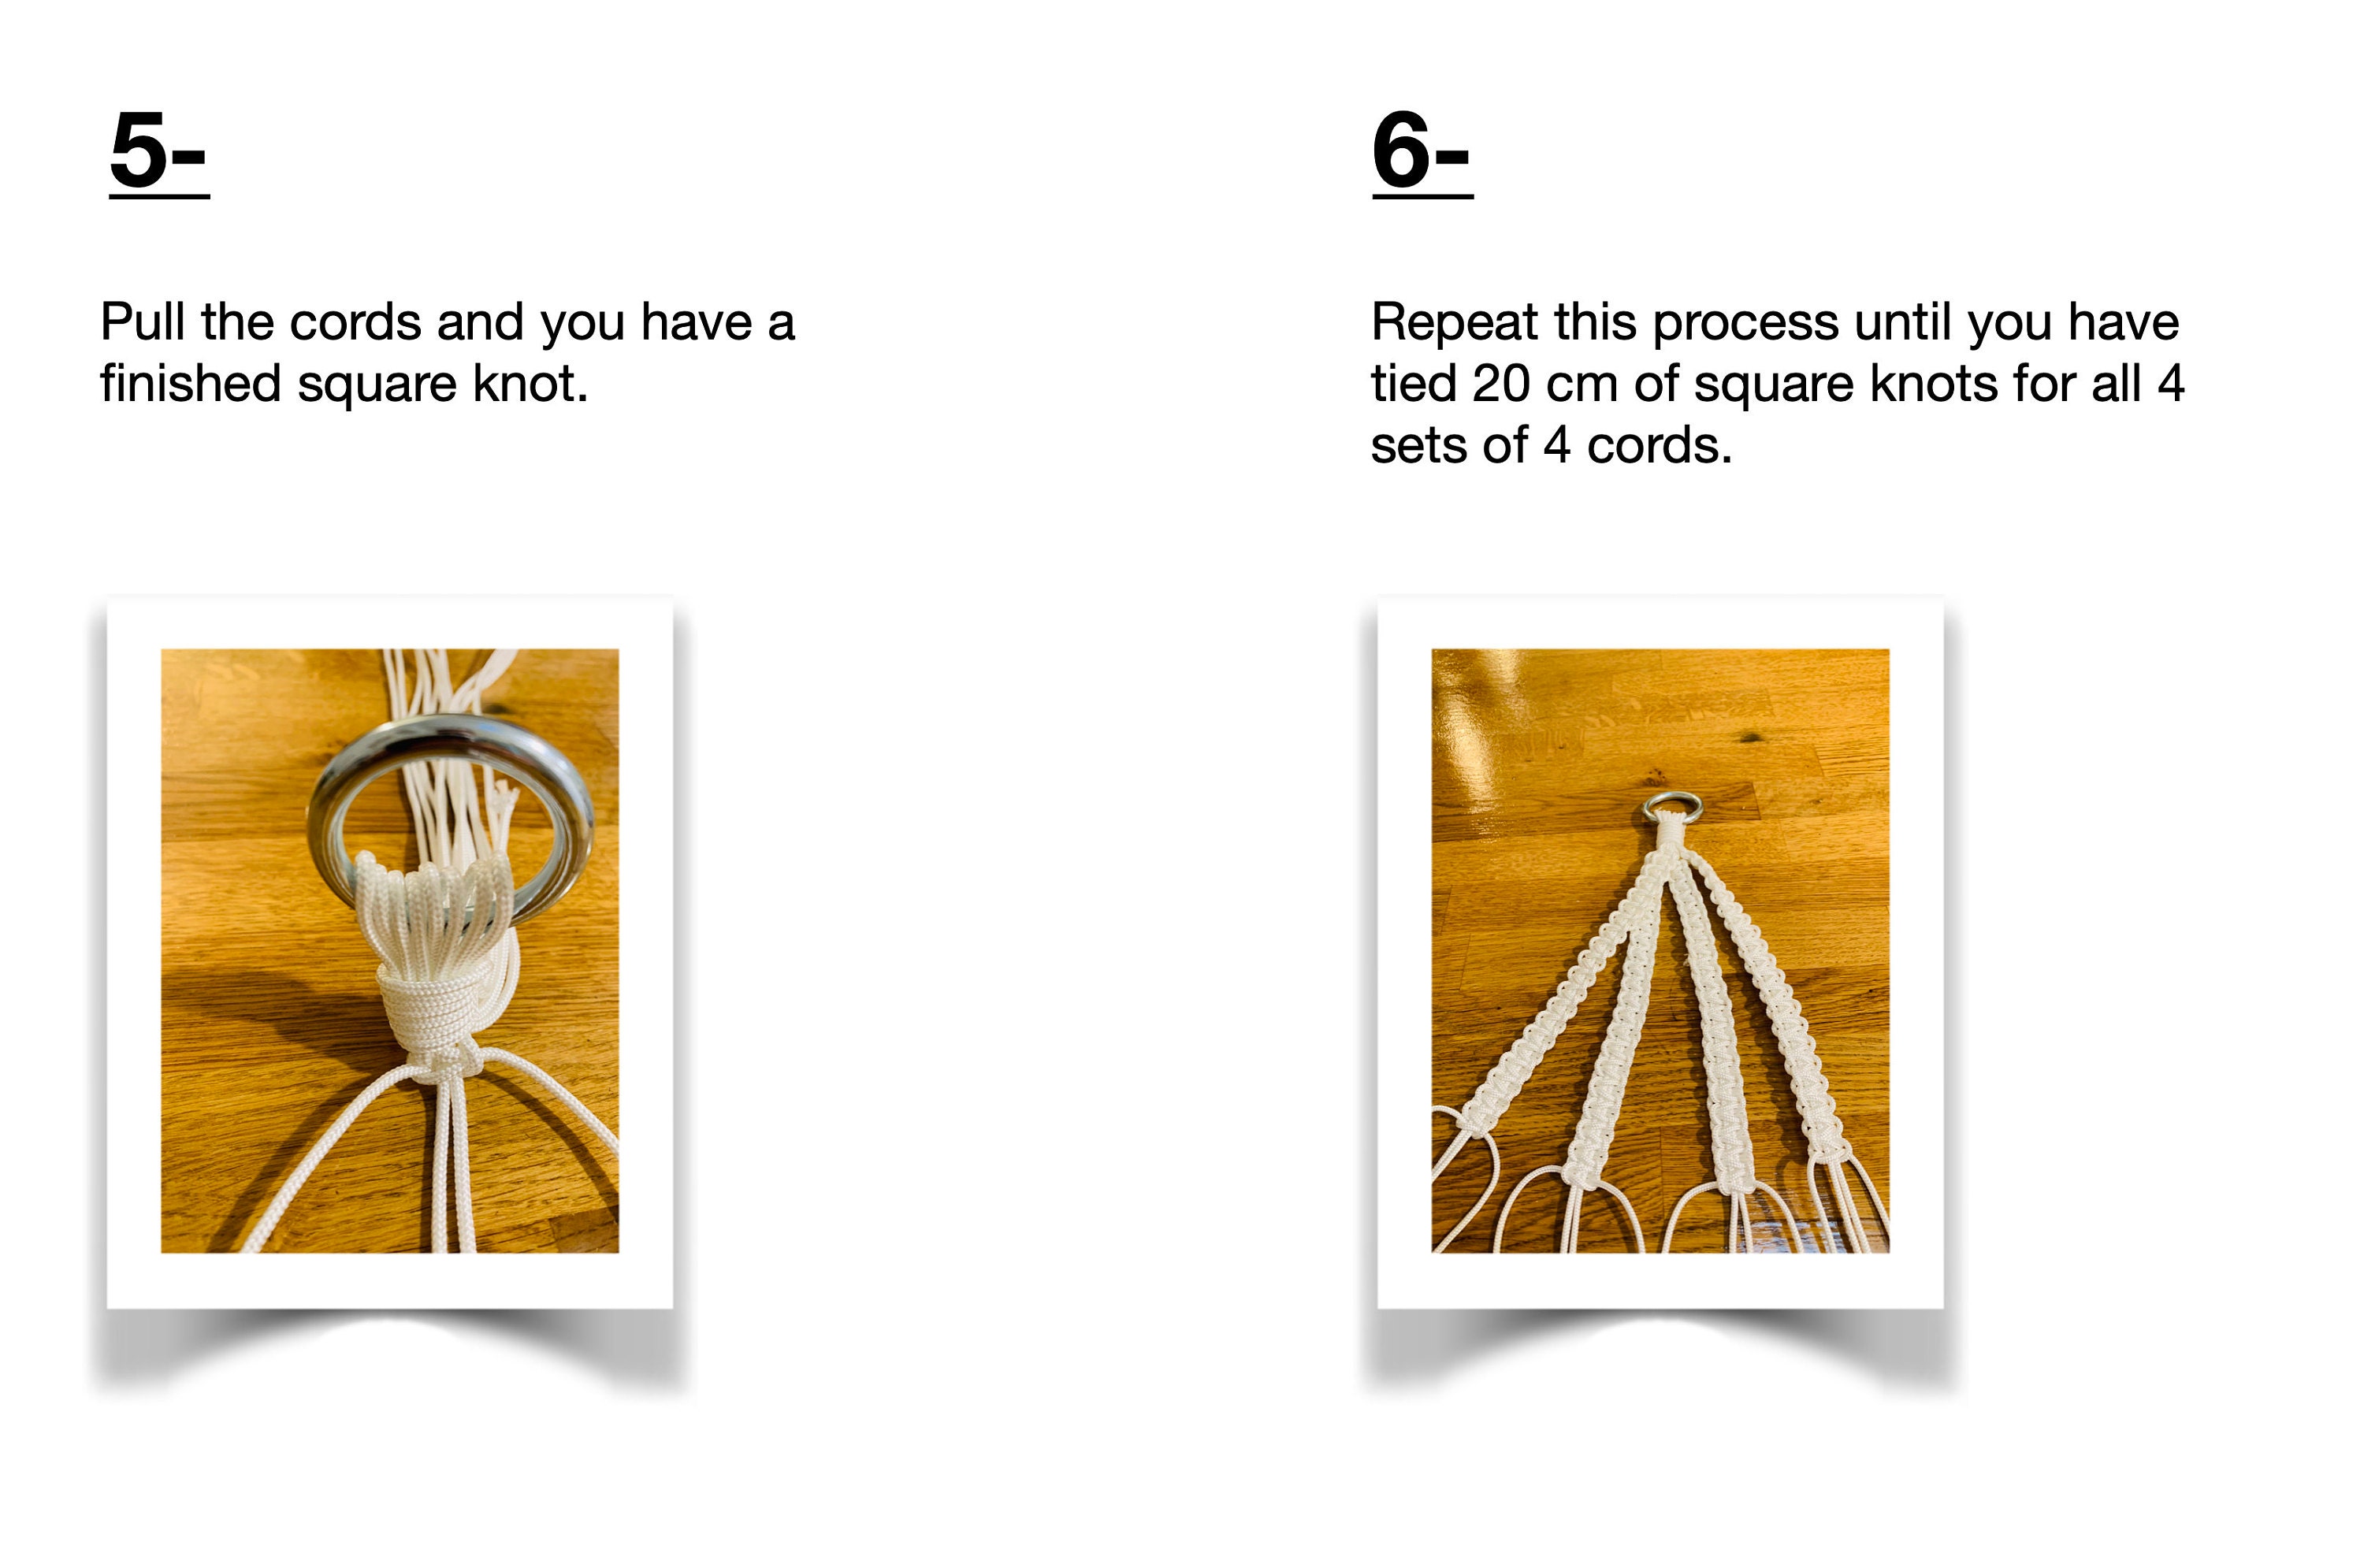
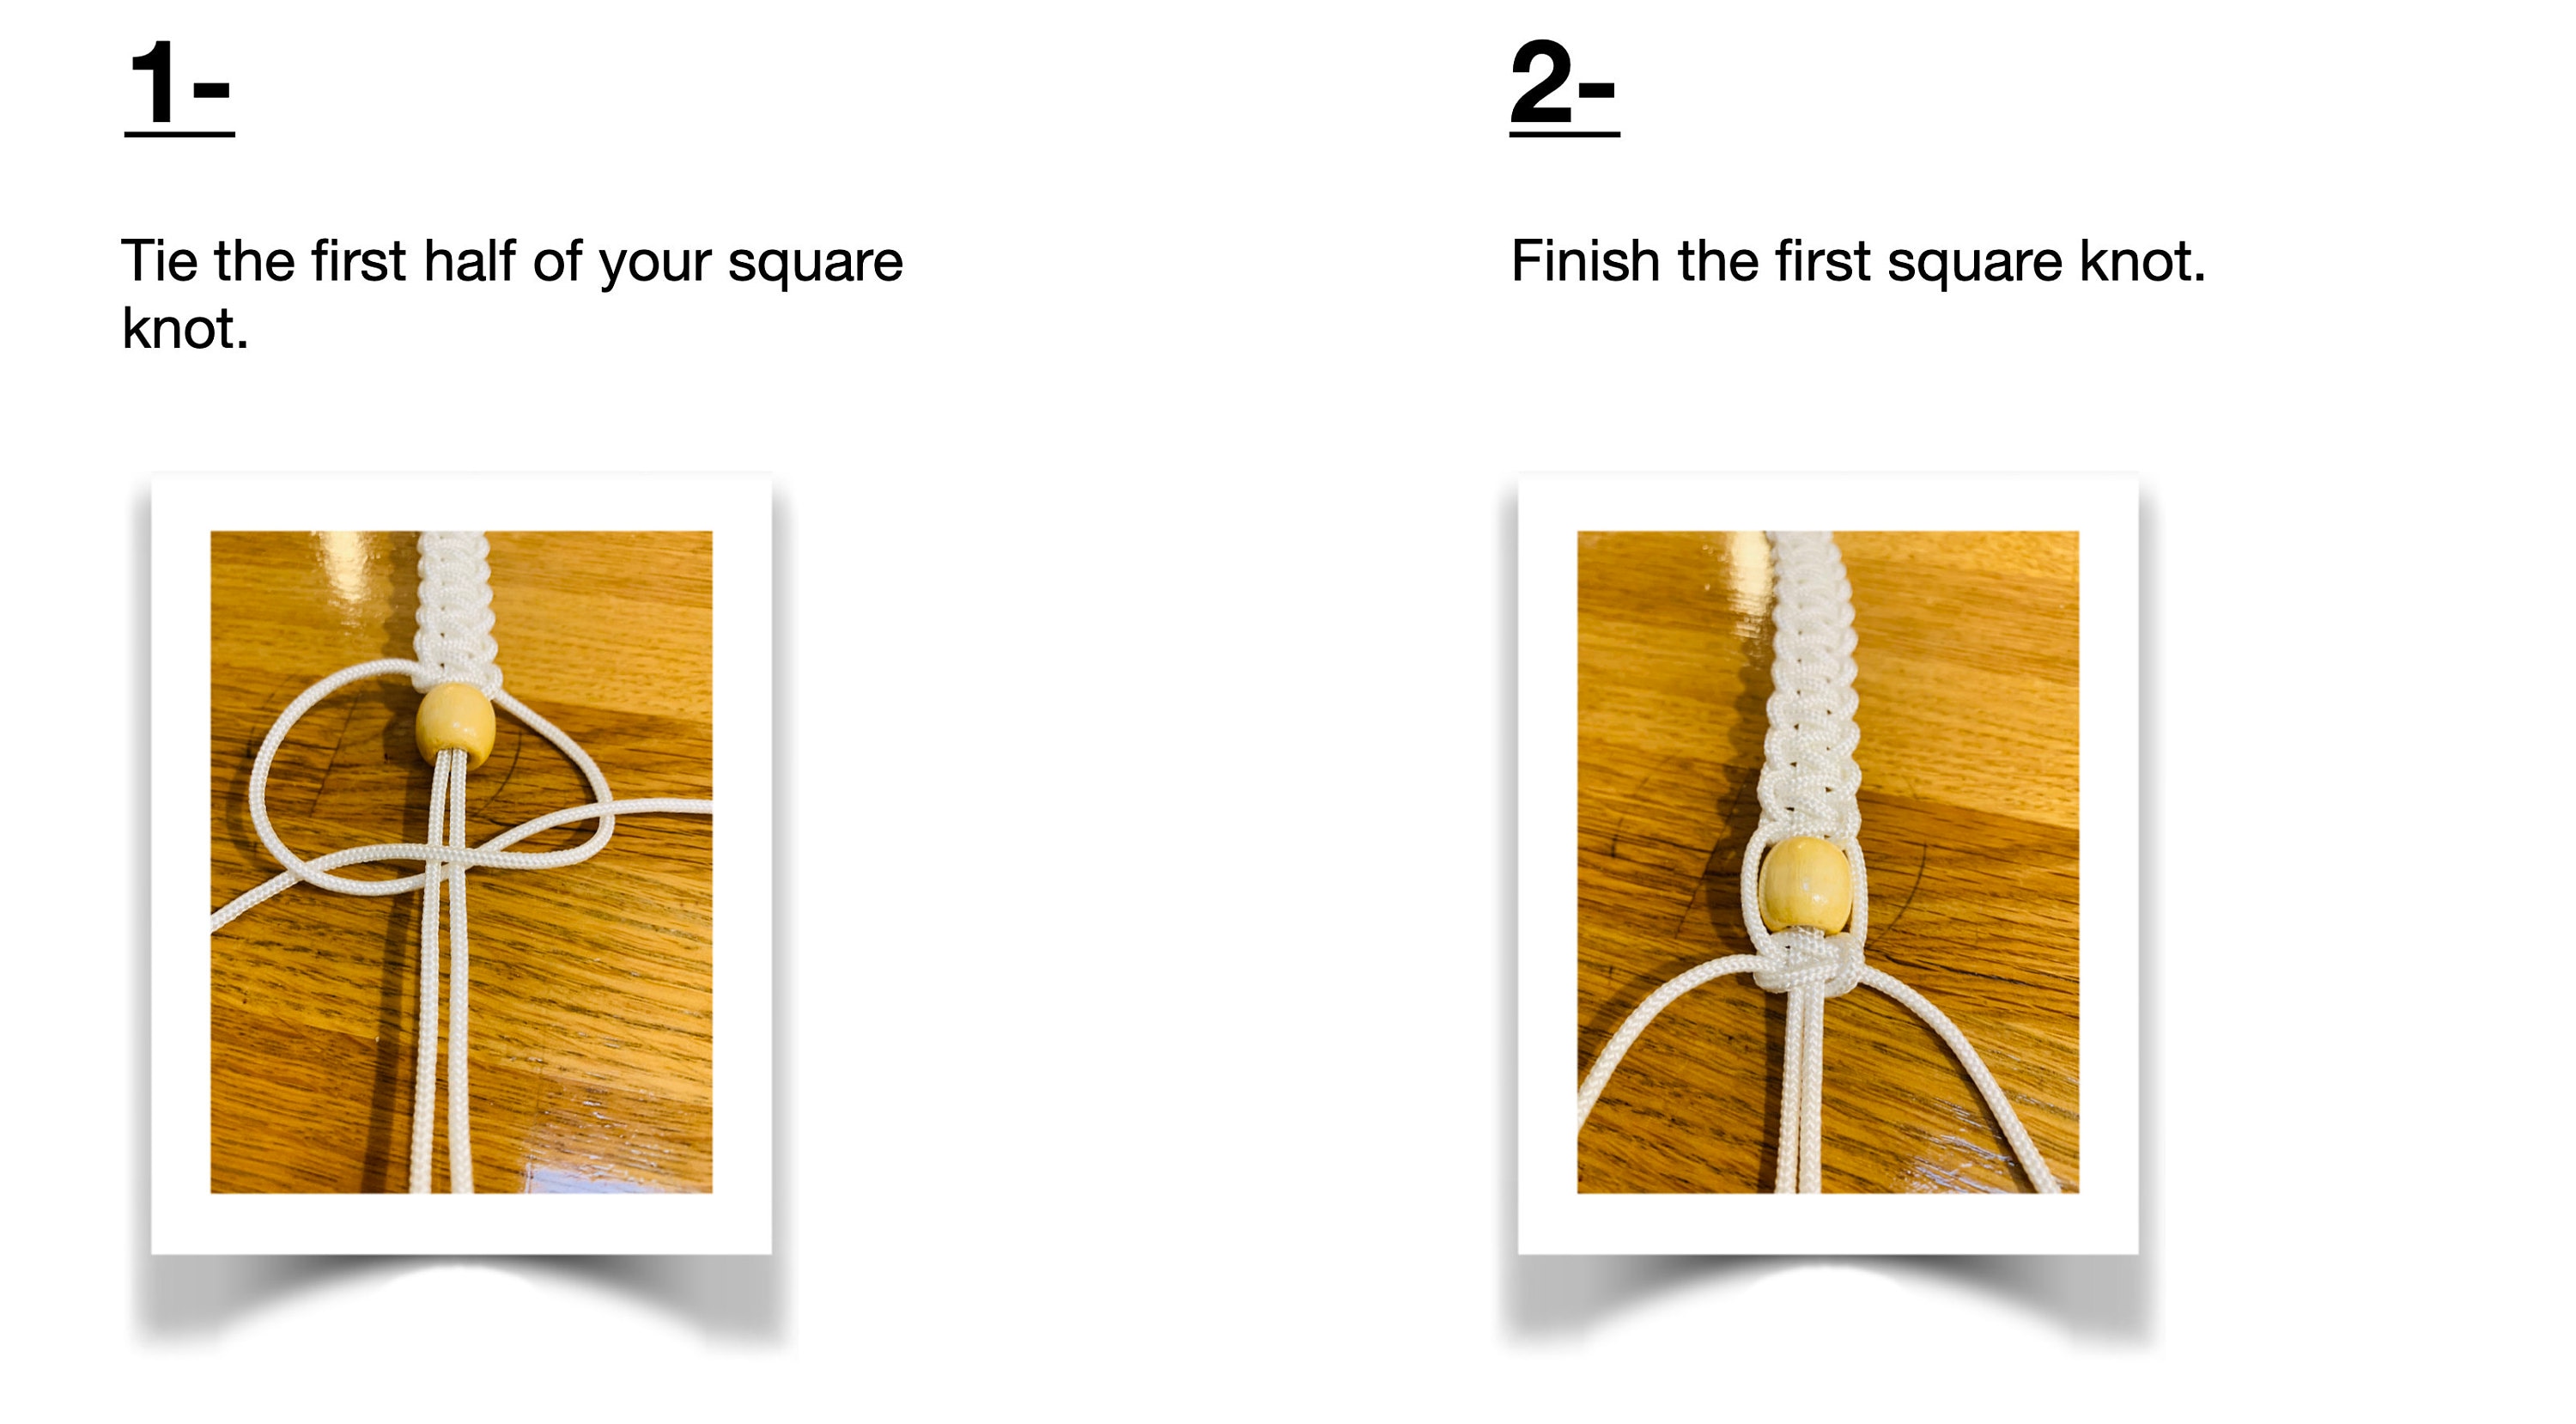
• Step 5: second row of square knots
We are now going to tie another 20cm of square knots on all 4 groups of cords just as we did in Step 3. The first knot is going to be a little trickier because of the bead; just make sure the knot is nice and tight around the bead.
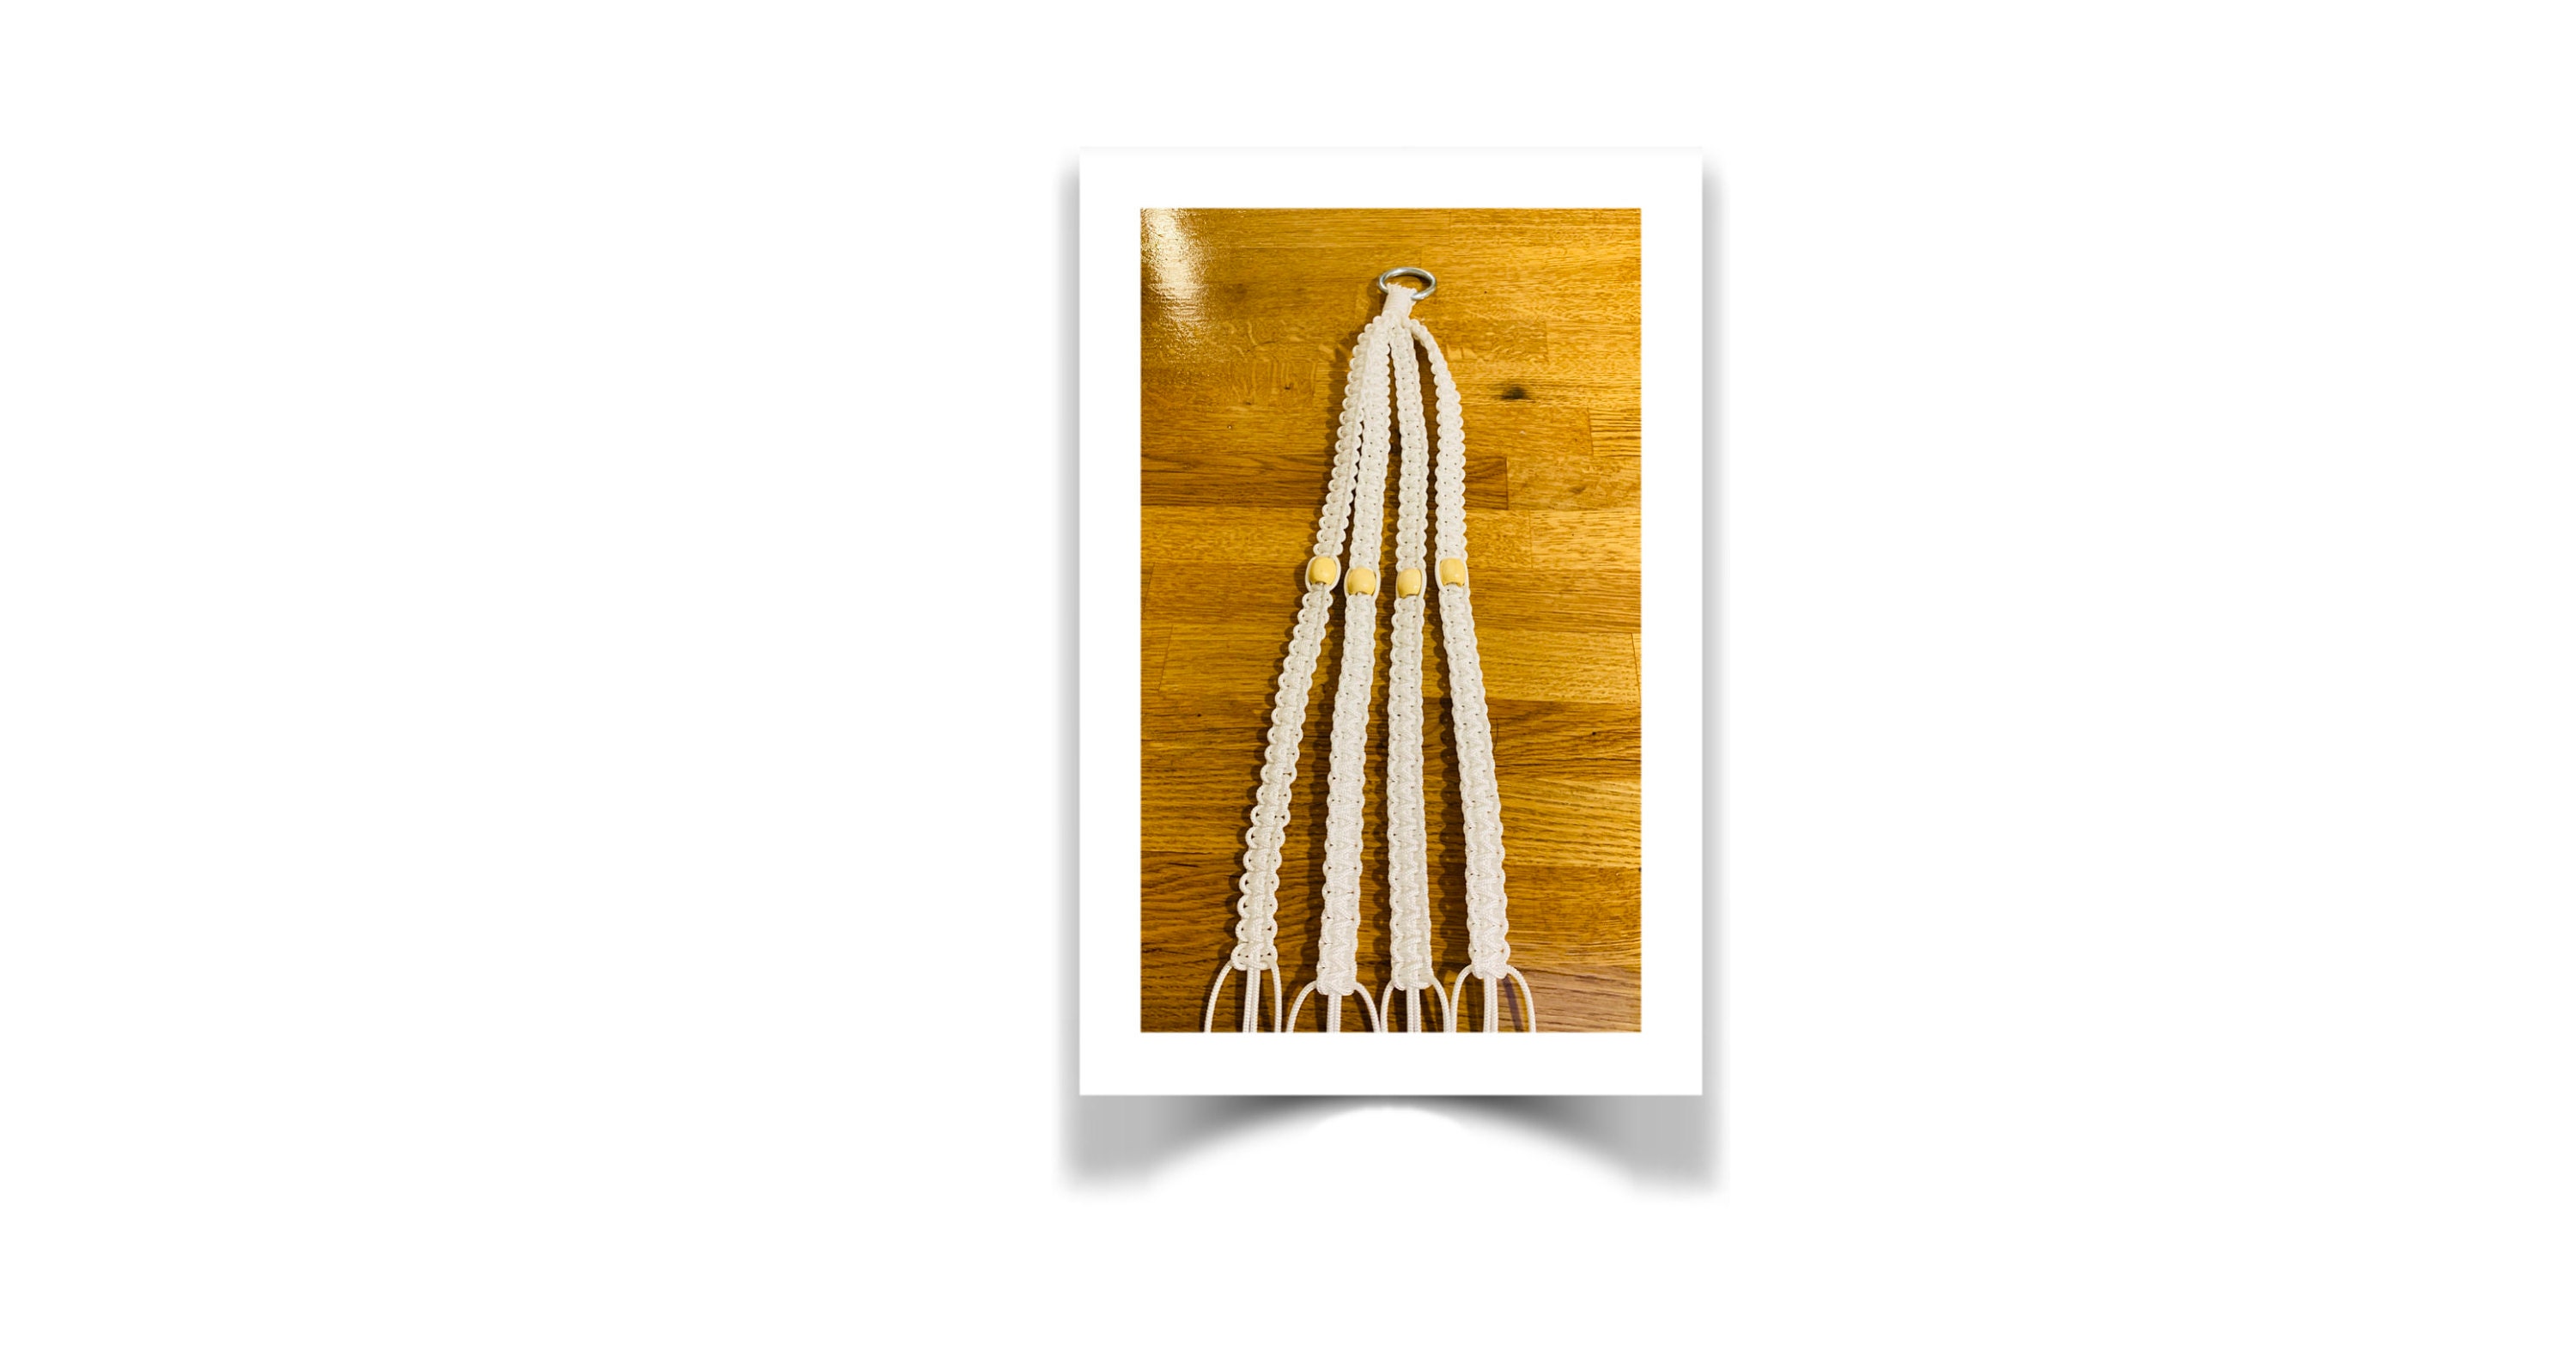
Repeat the operation until you have tied 20cm of square knots on each of the 4 groups of cords. When you are done your macrame should look like the following picture.
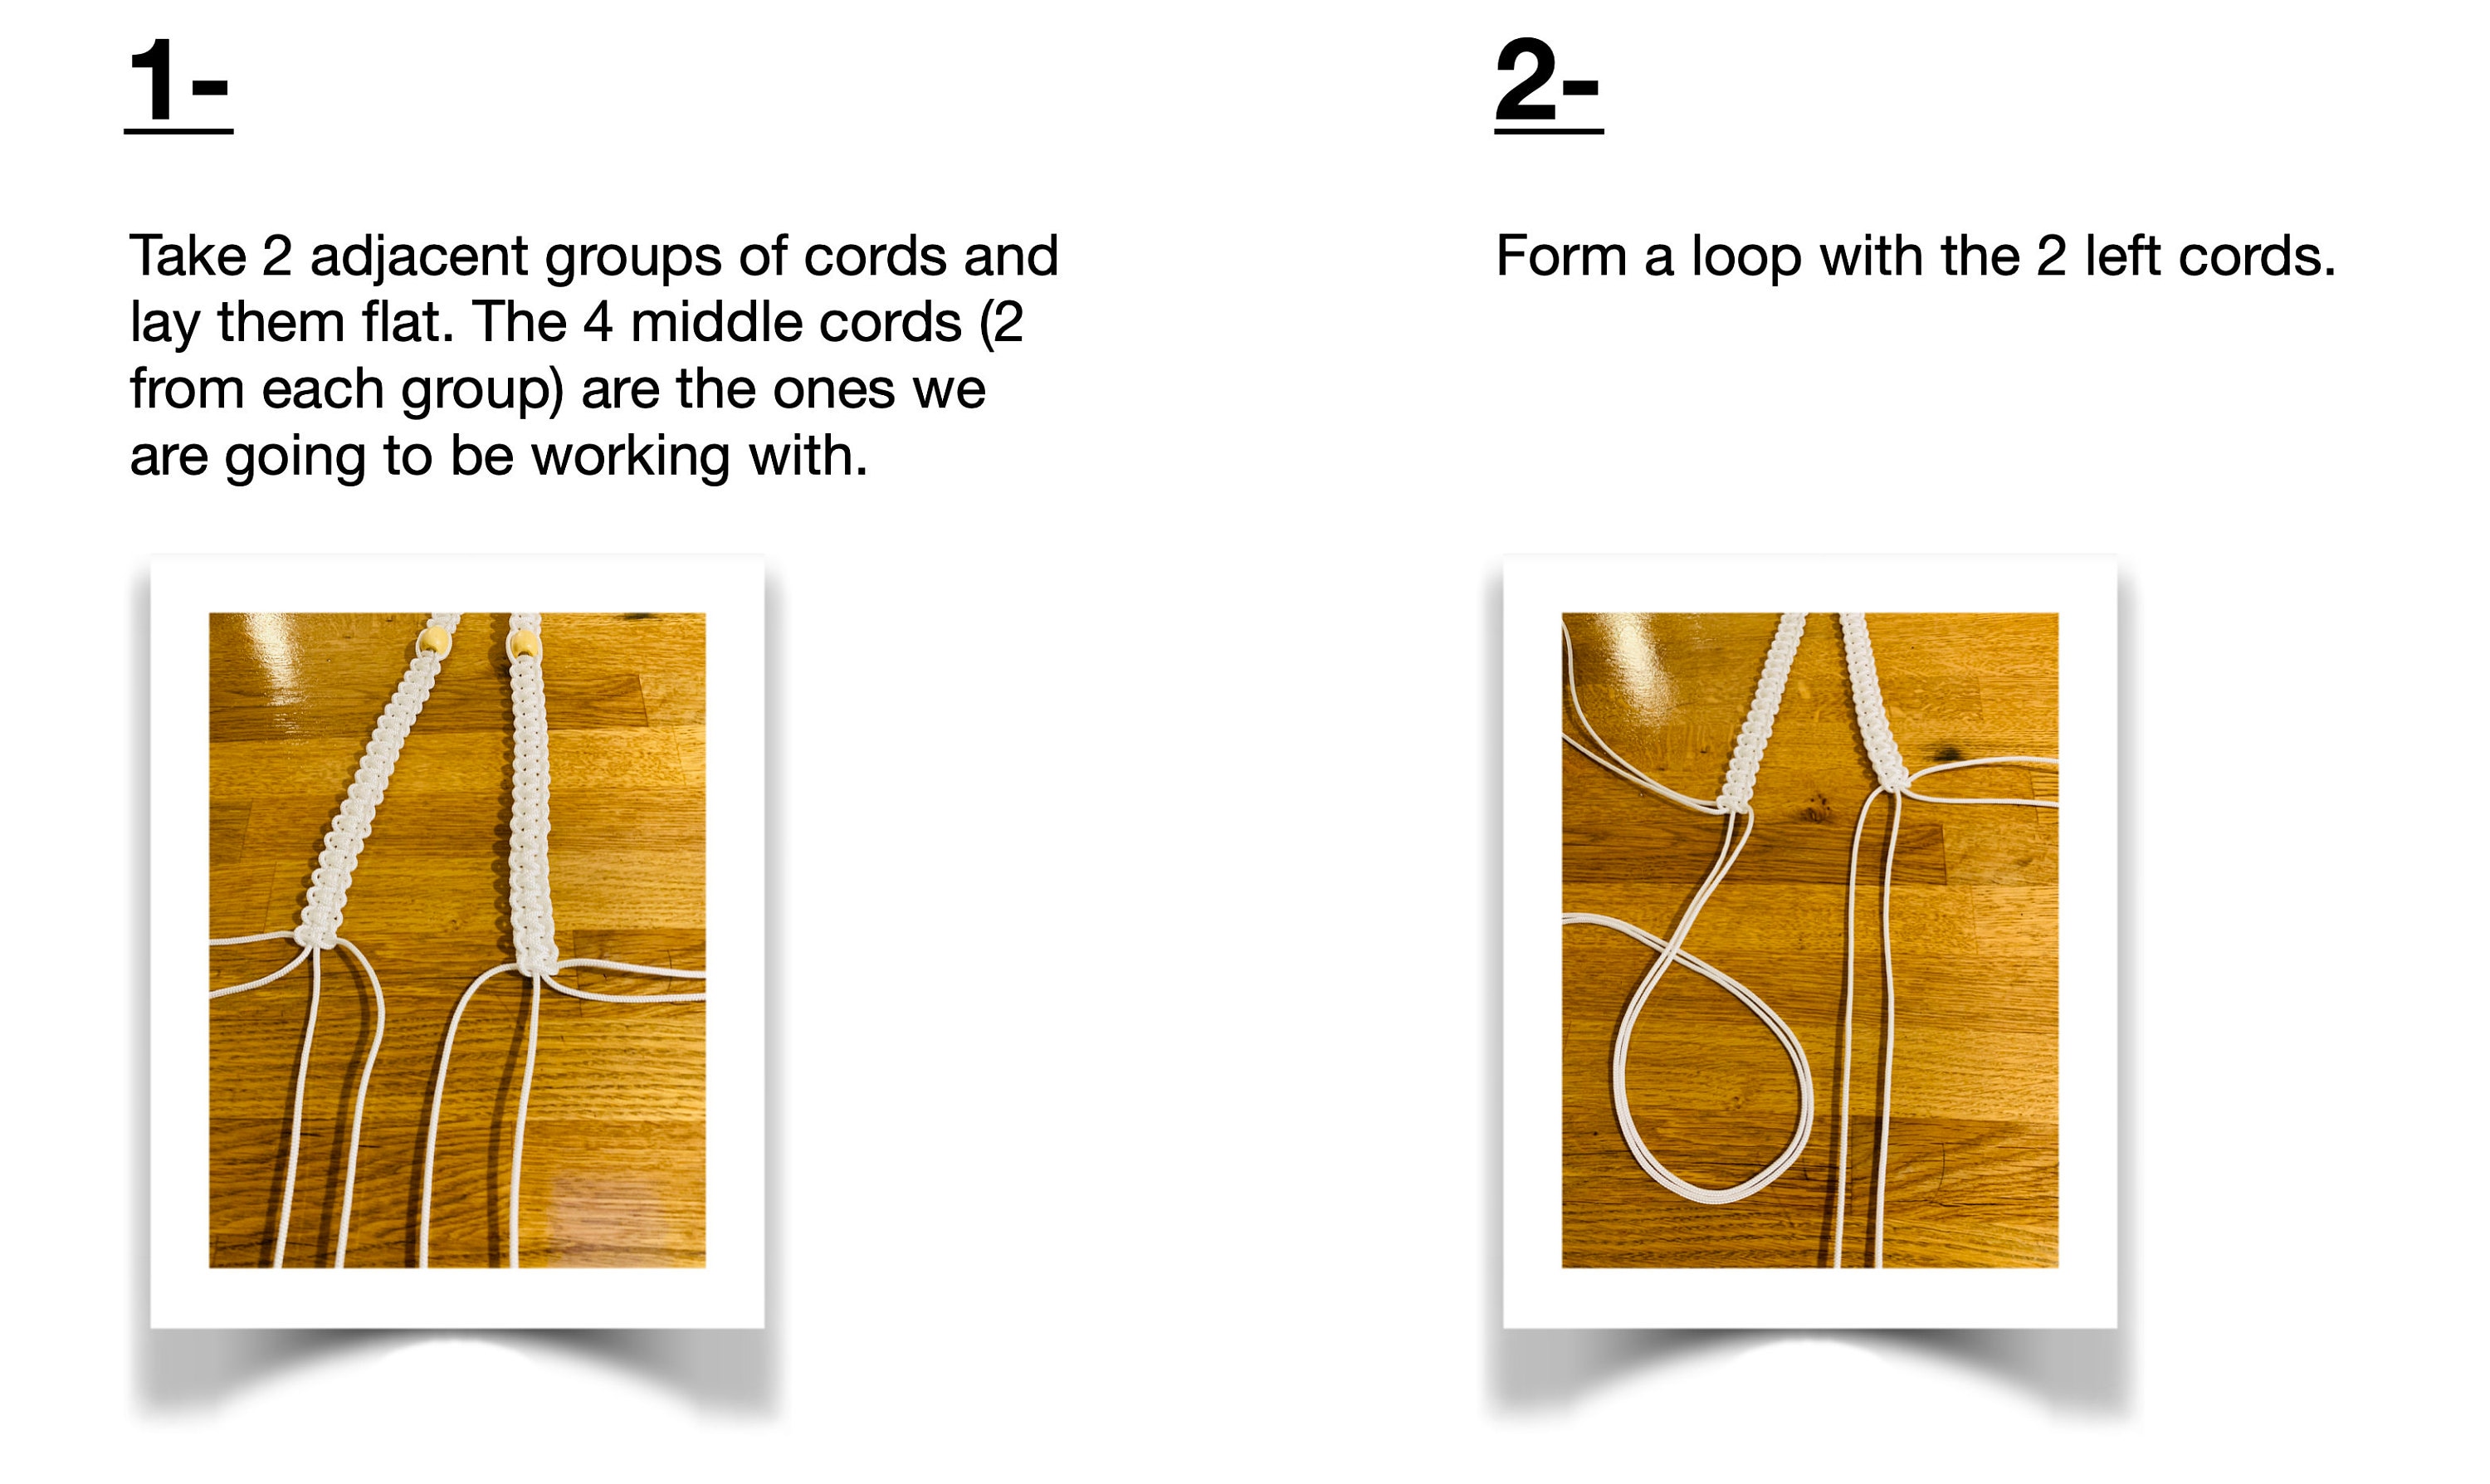
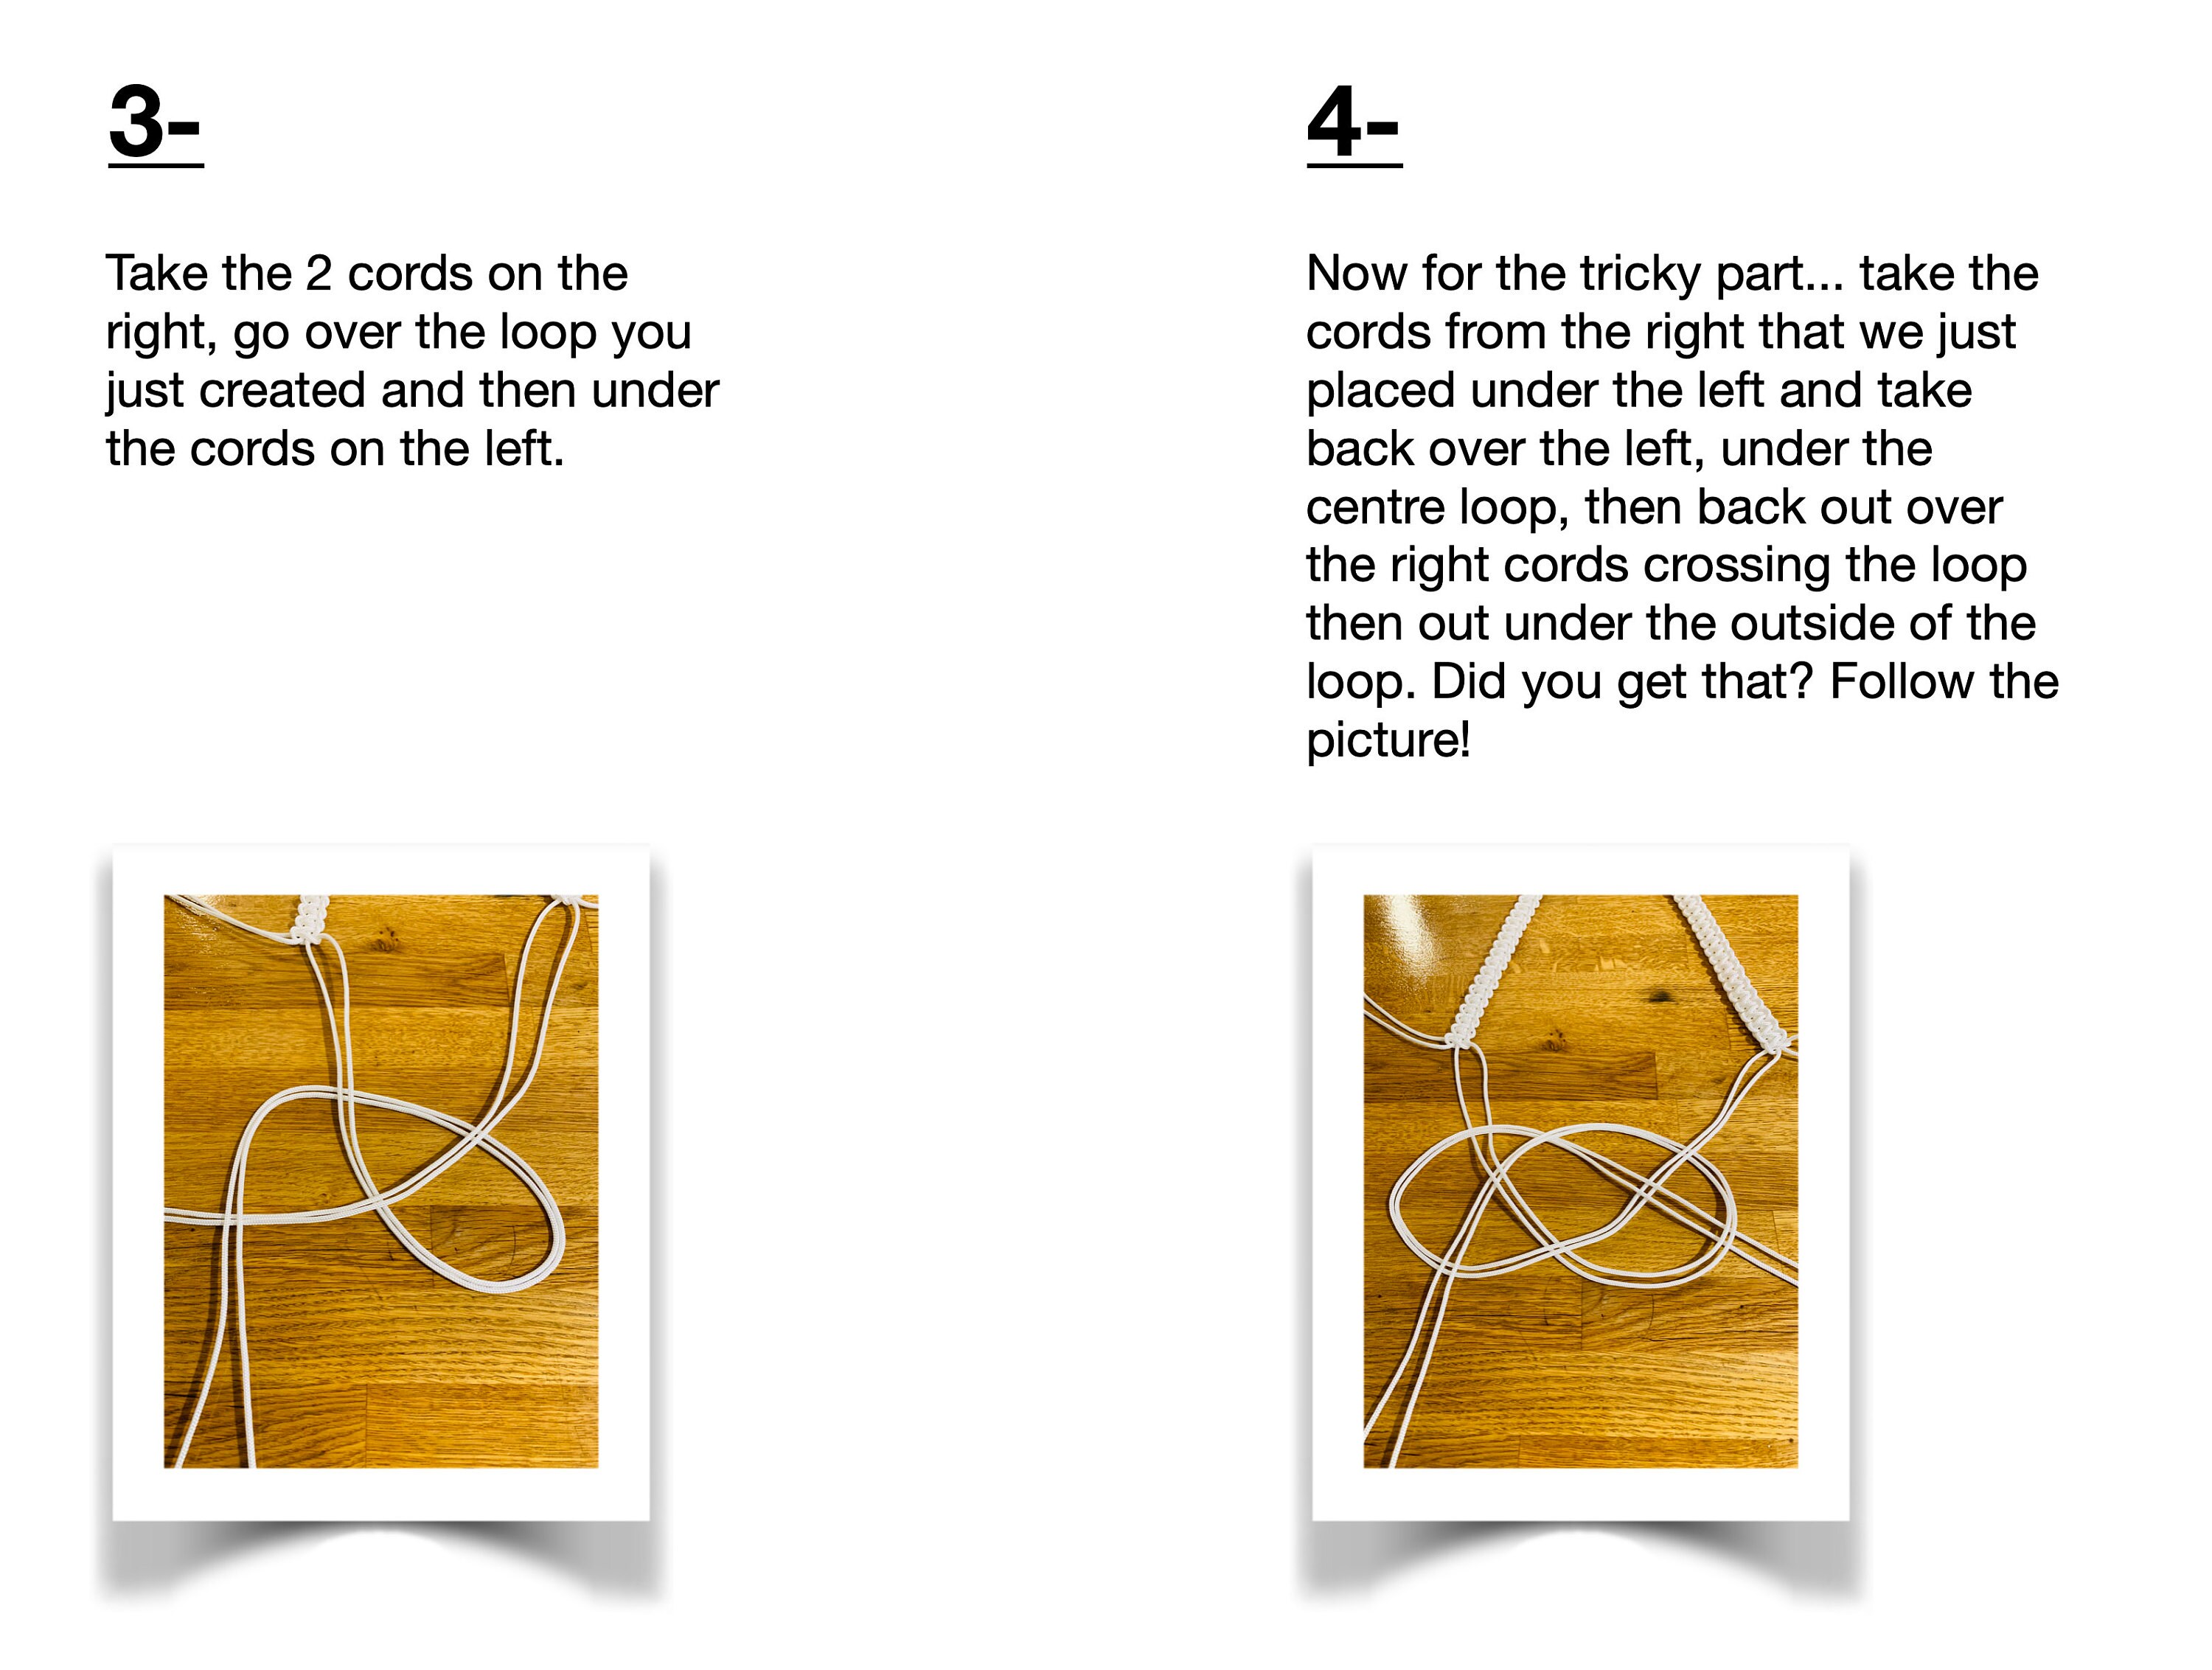
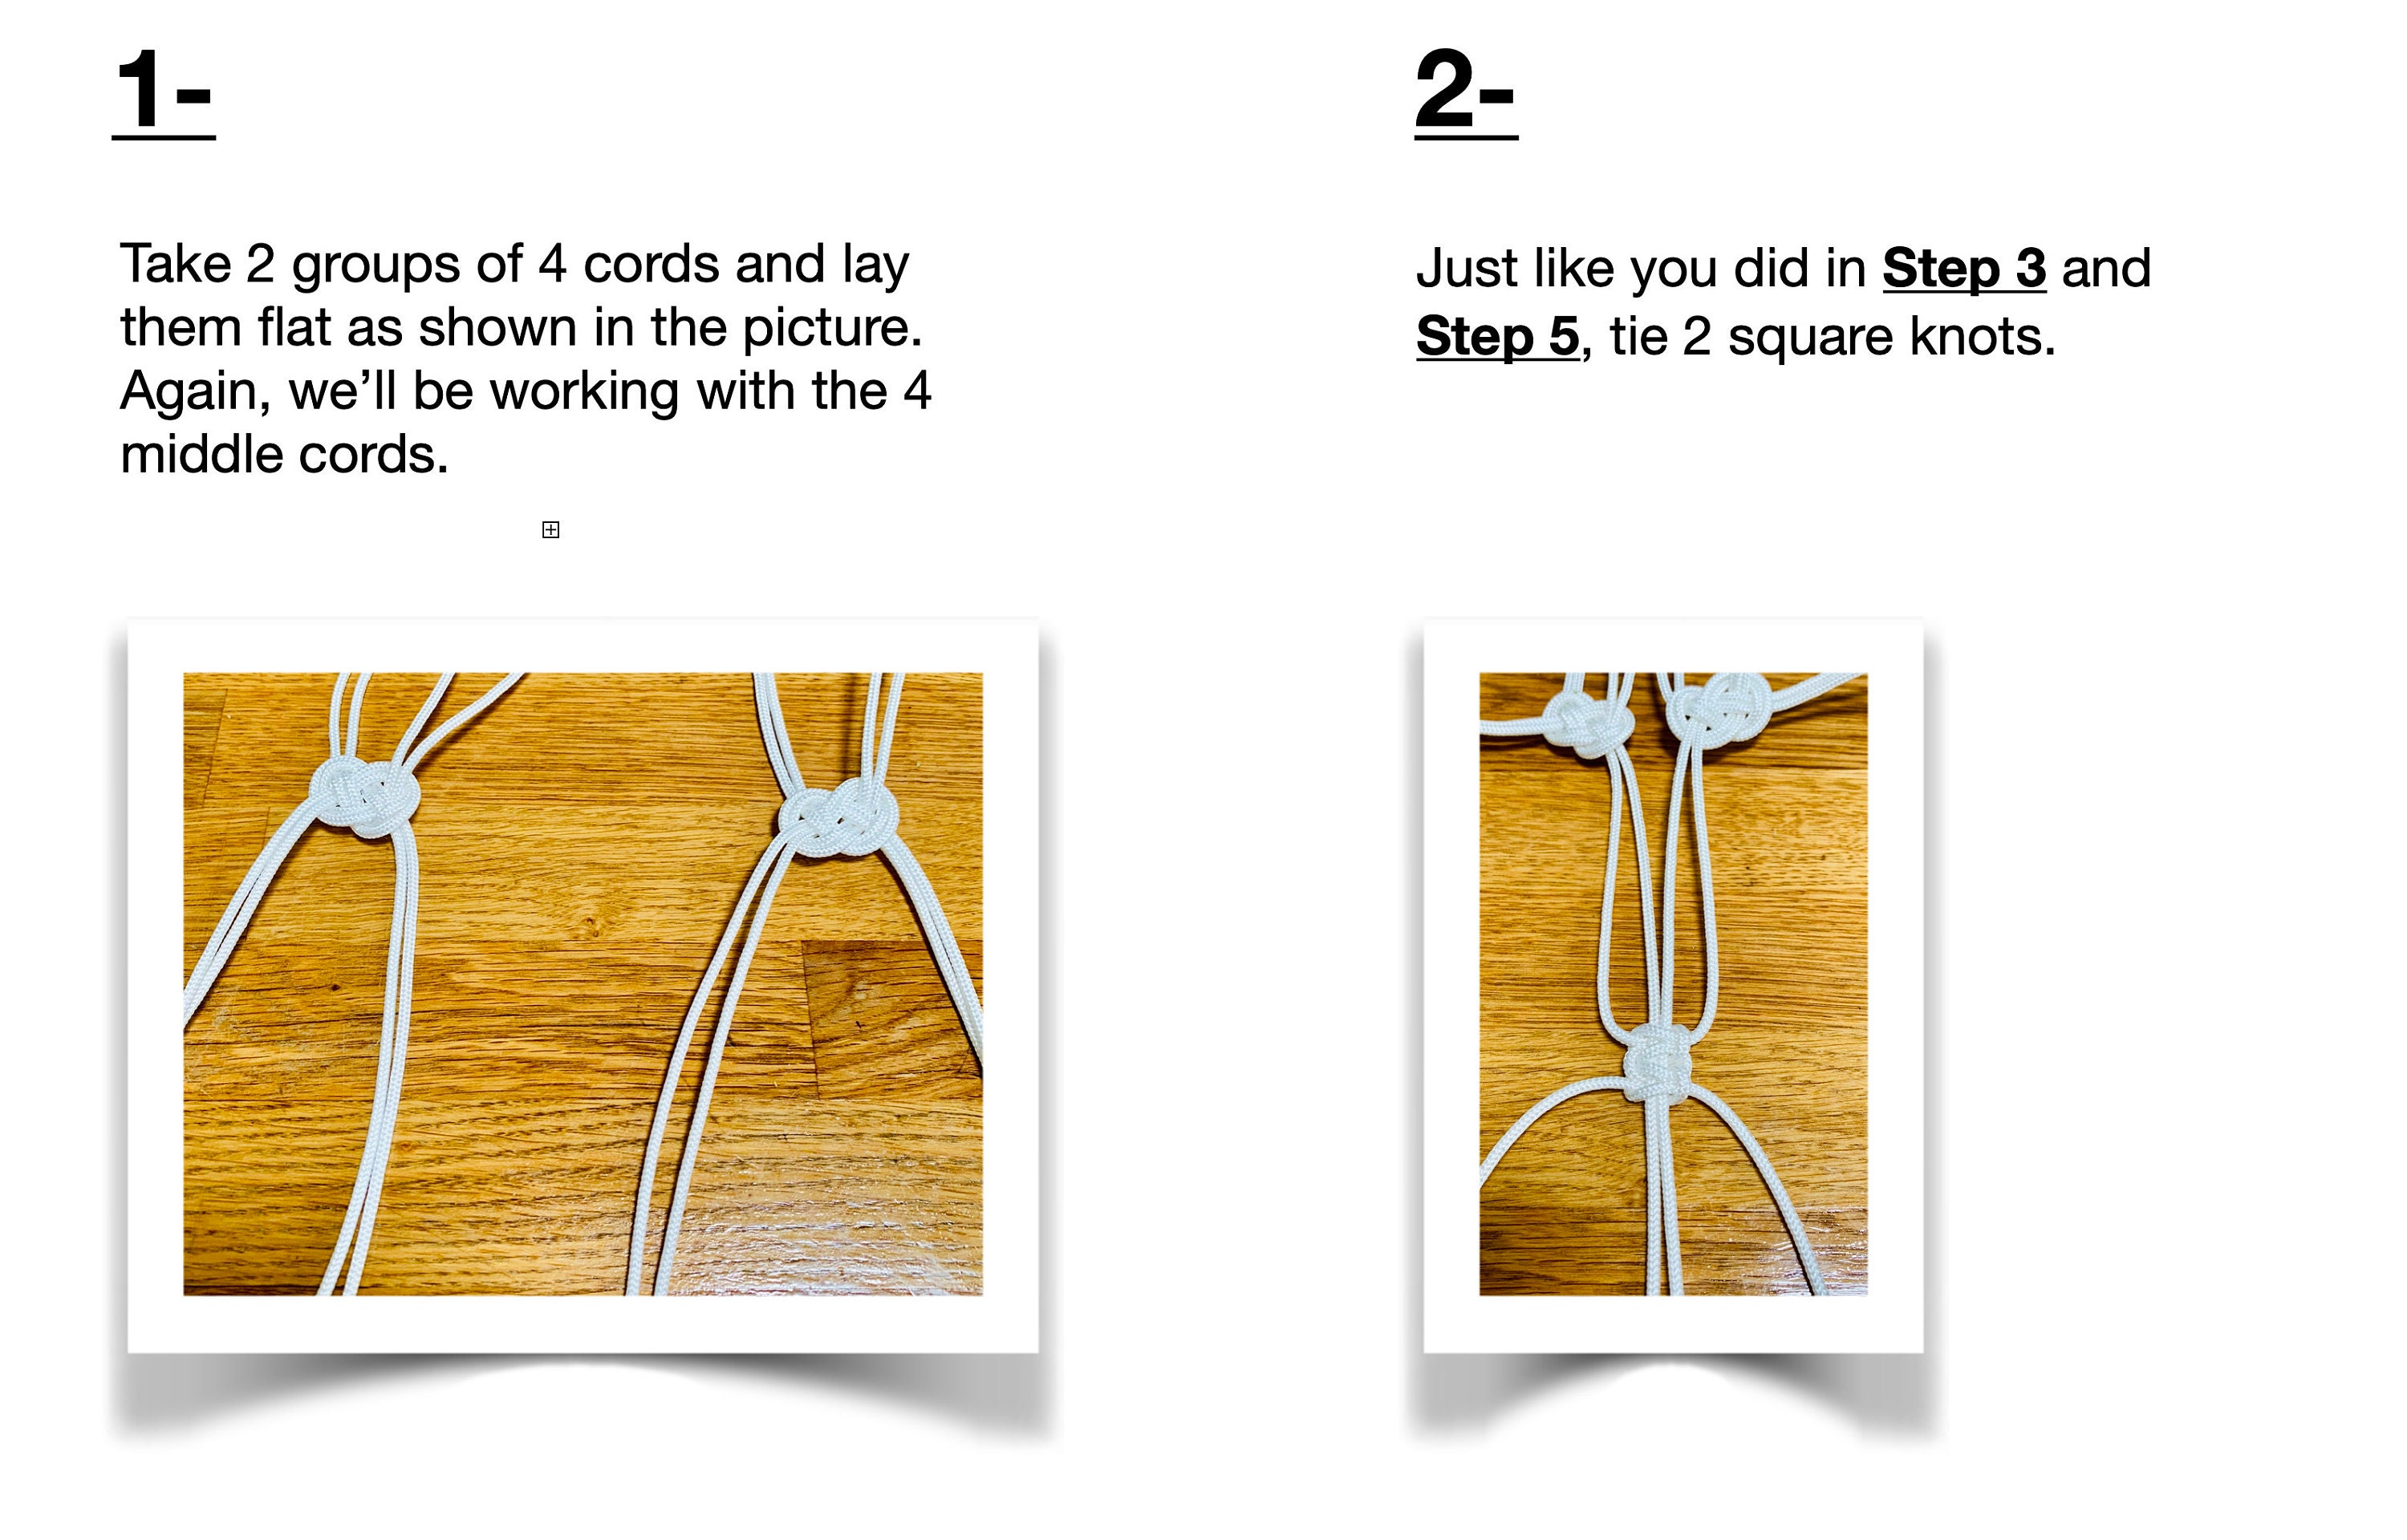
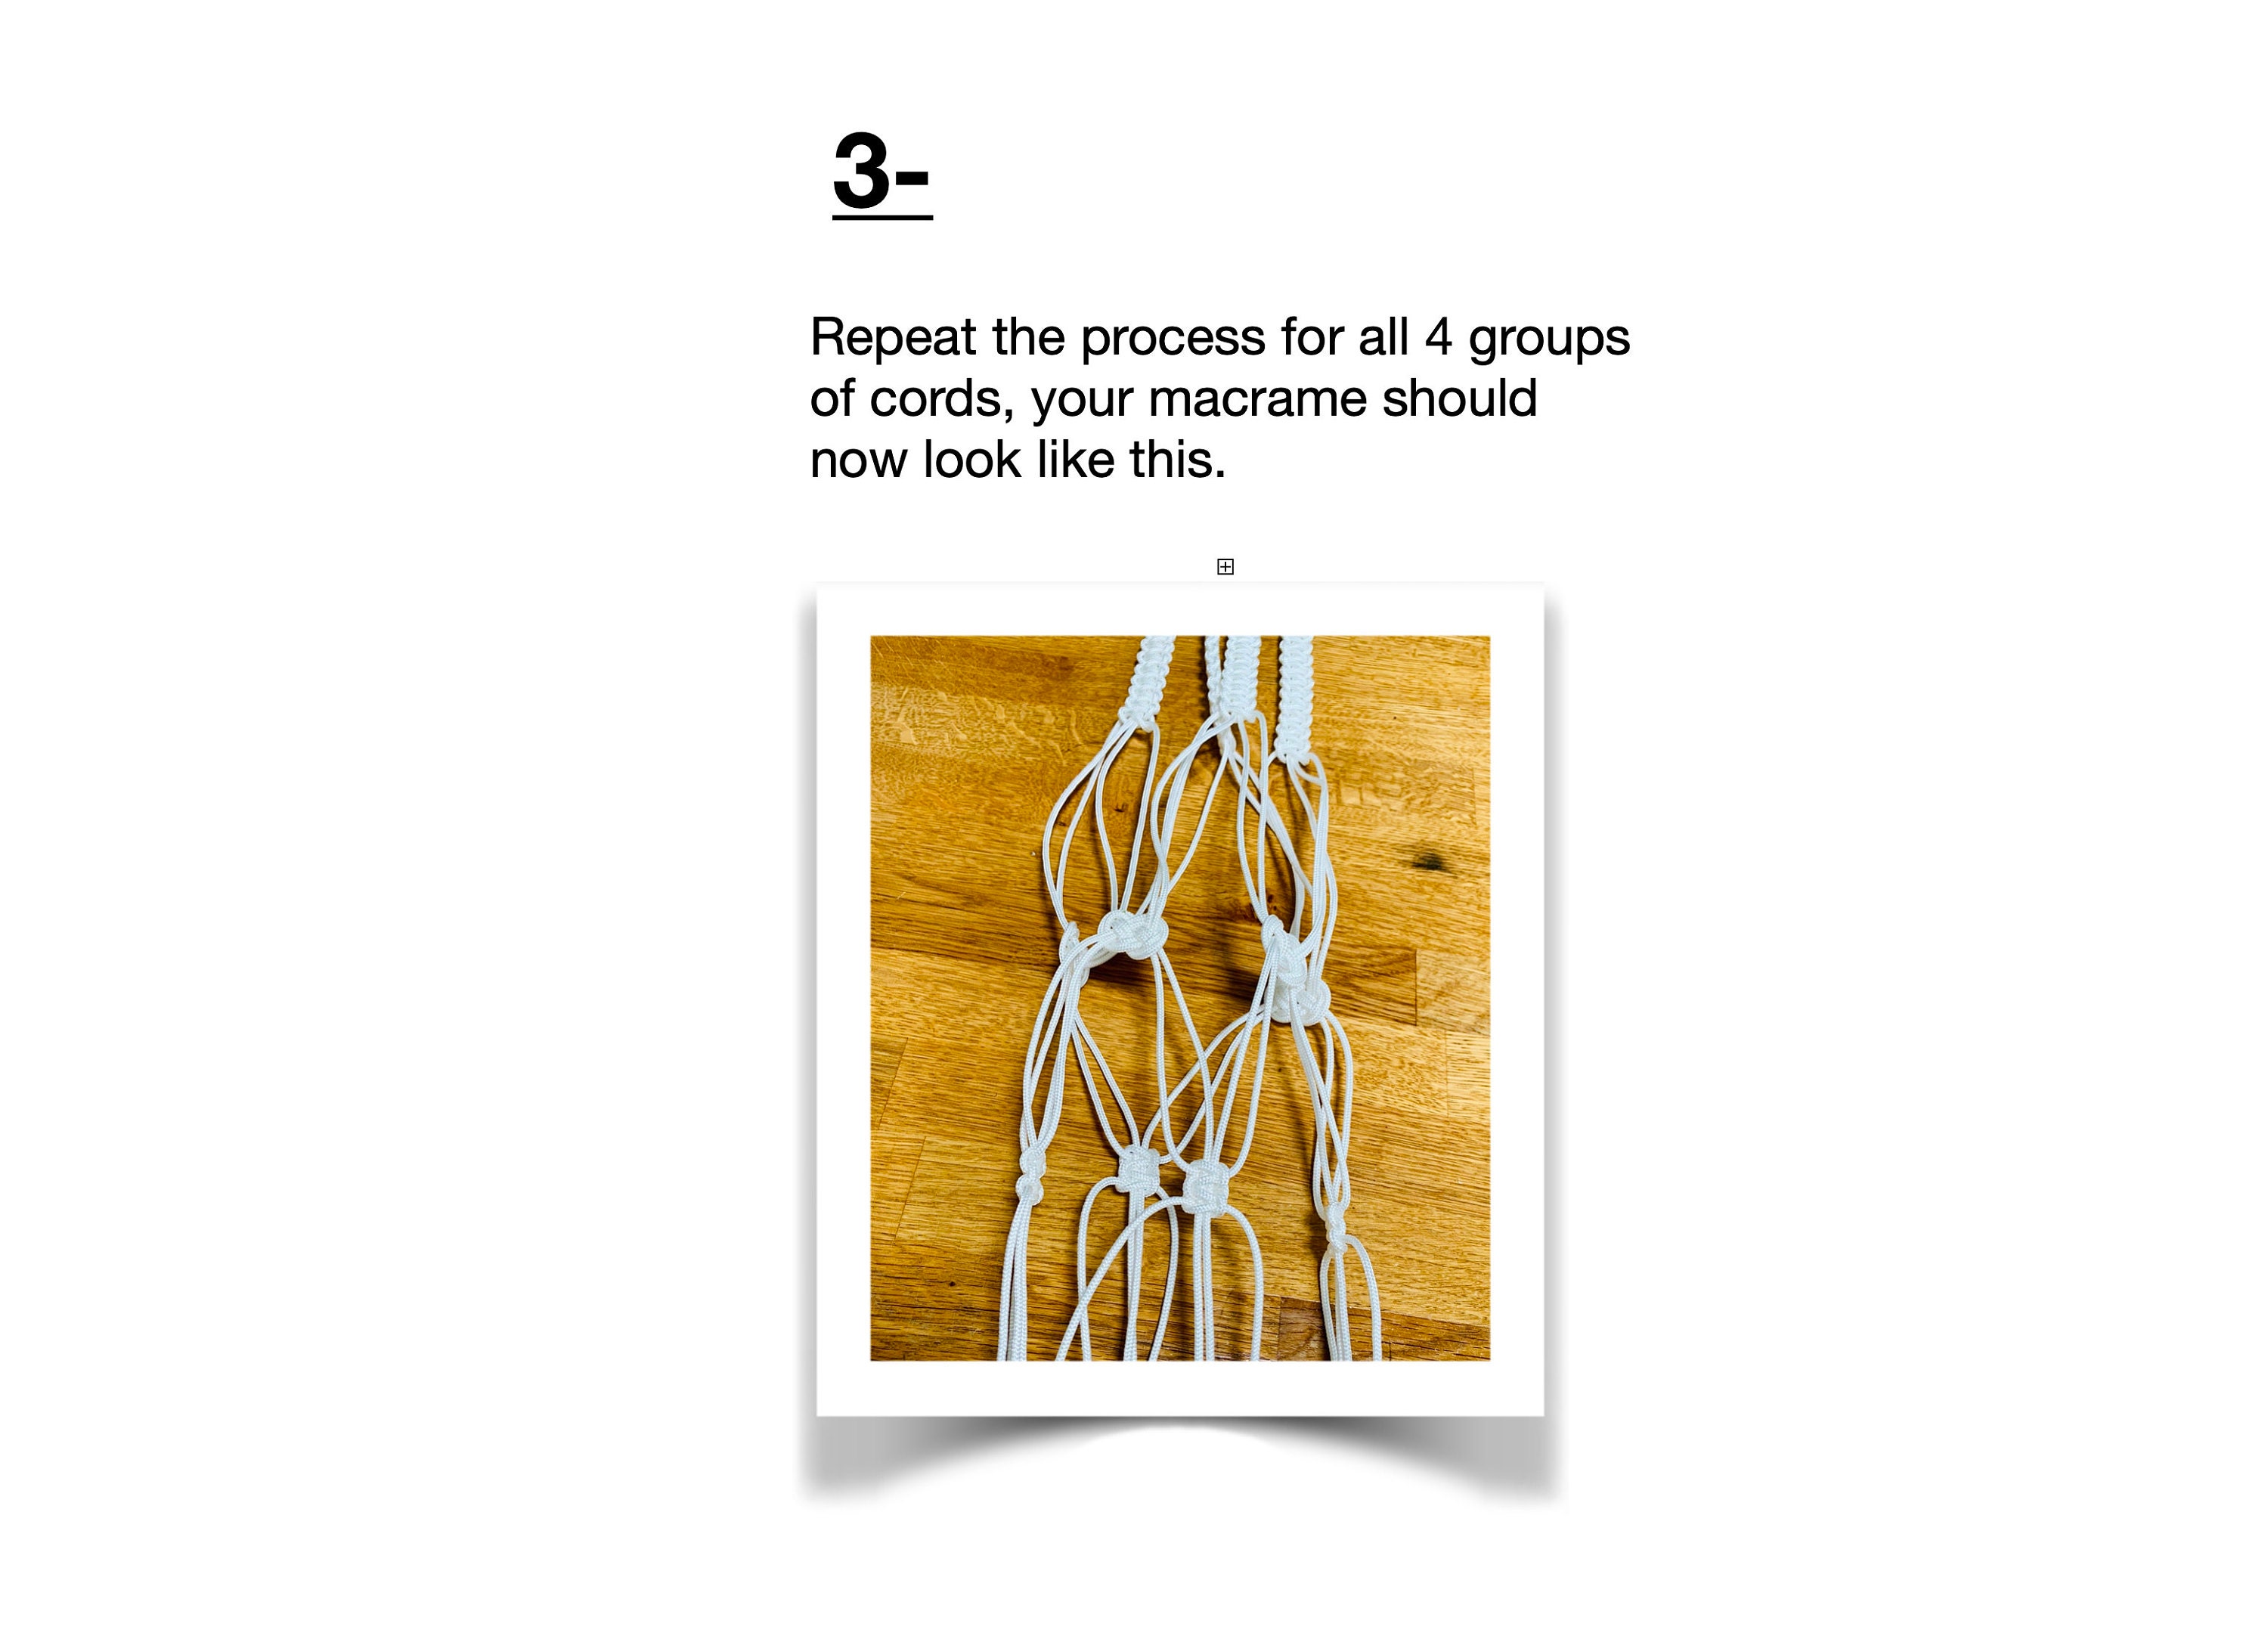
• Step 6: Josephine knots
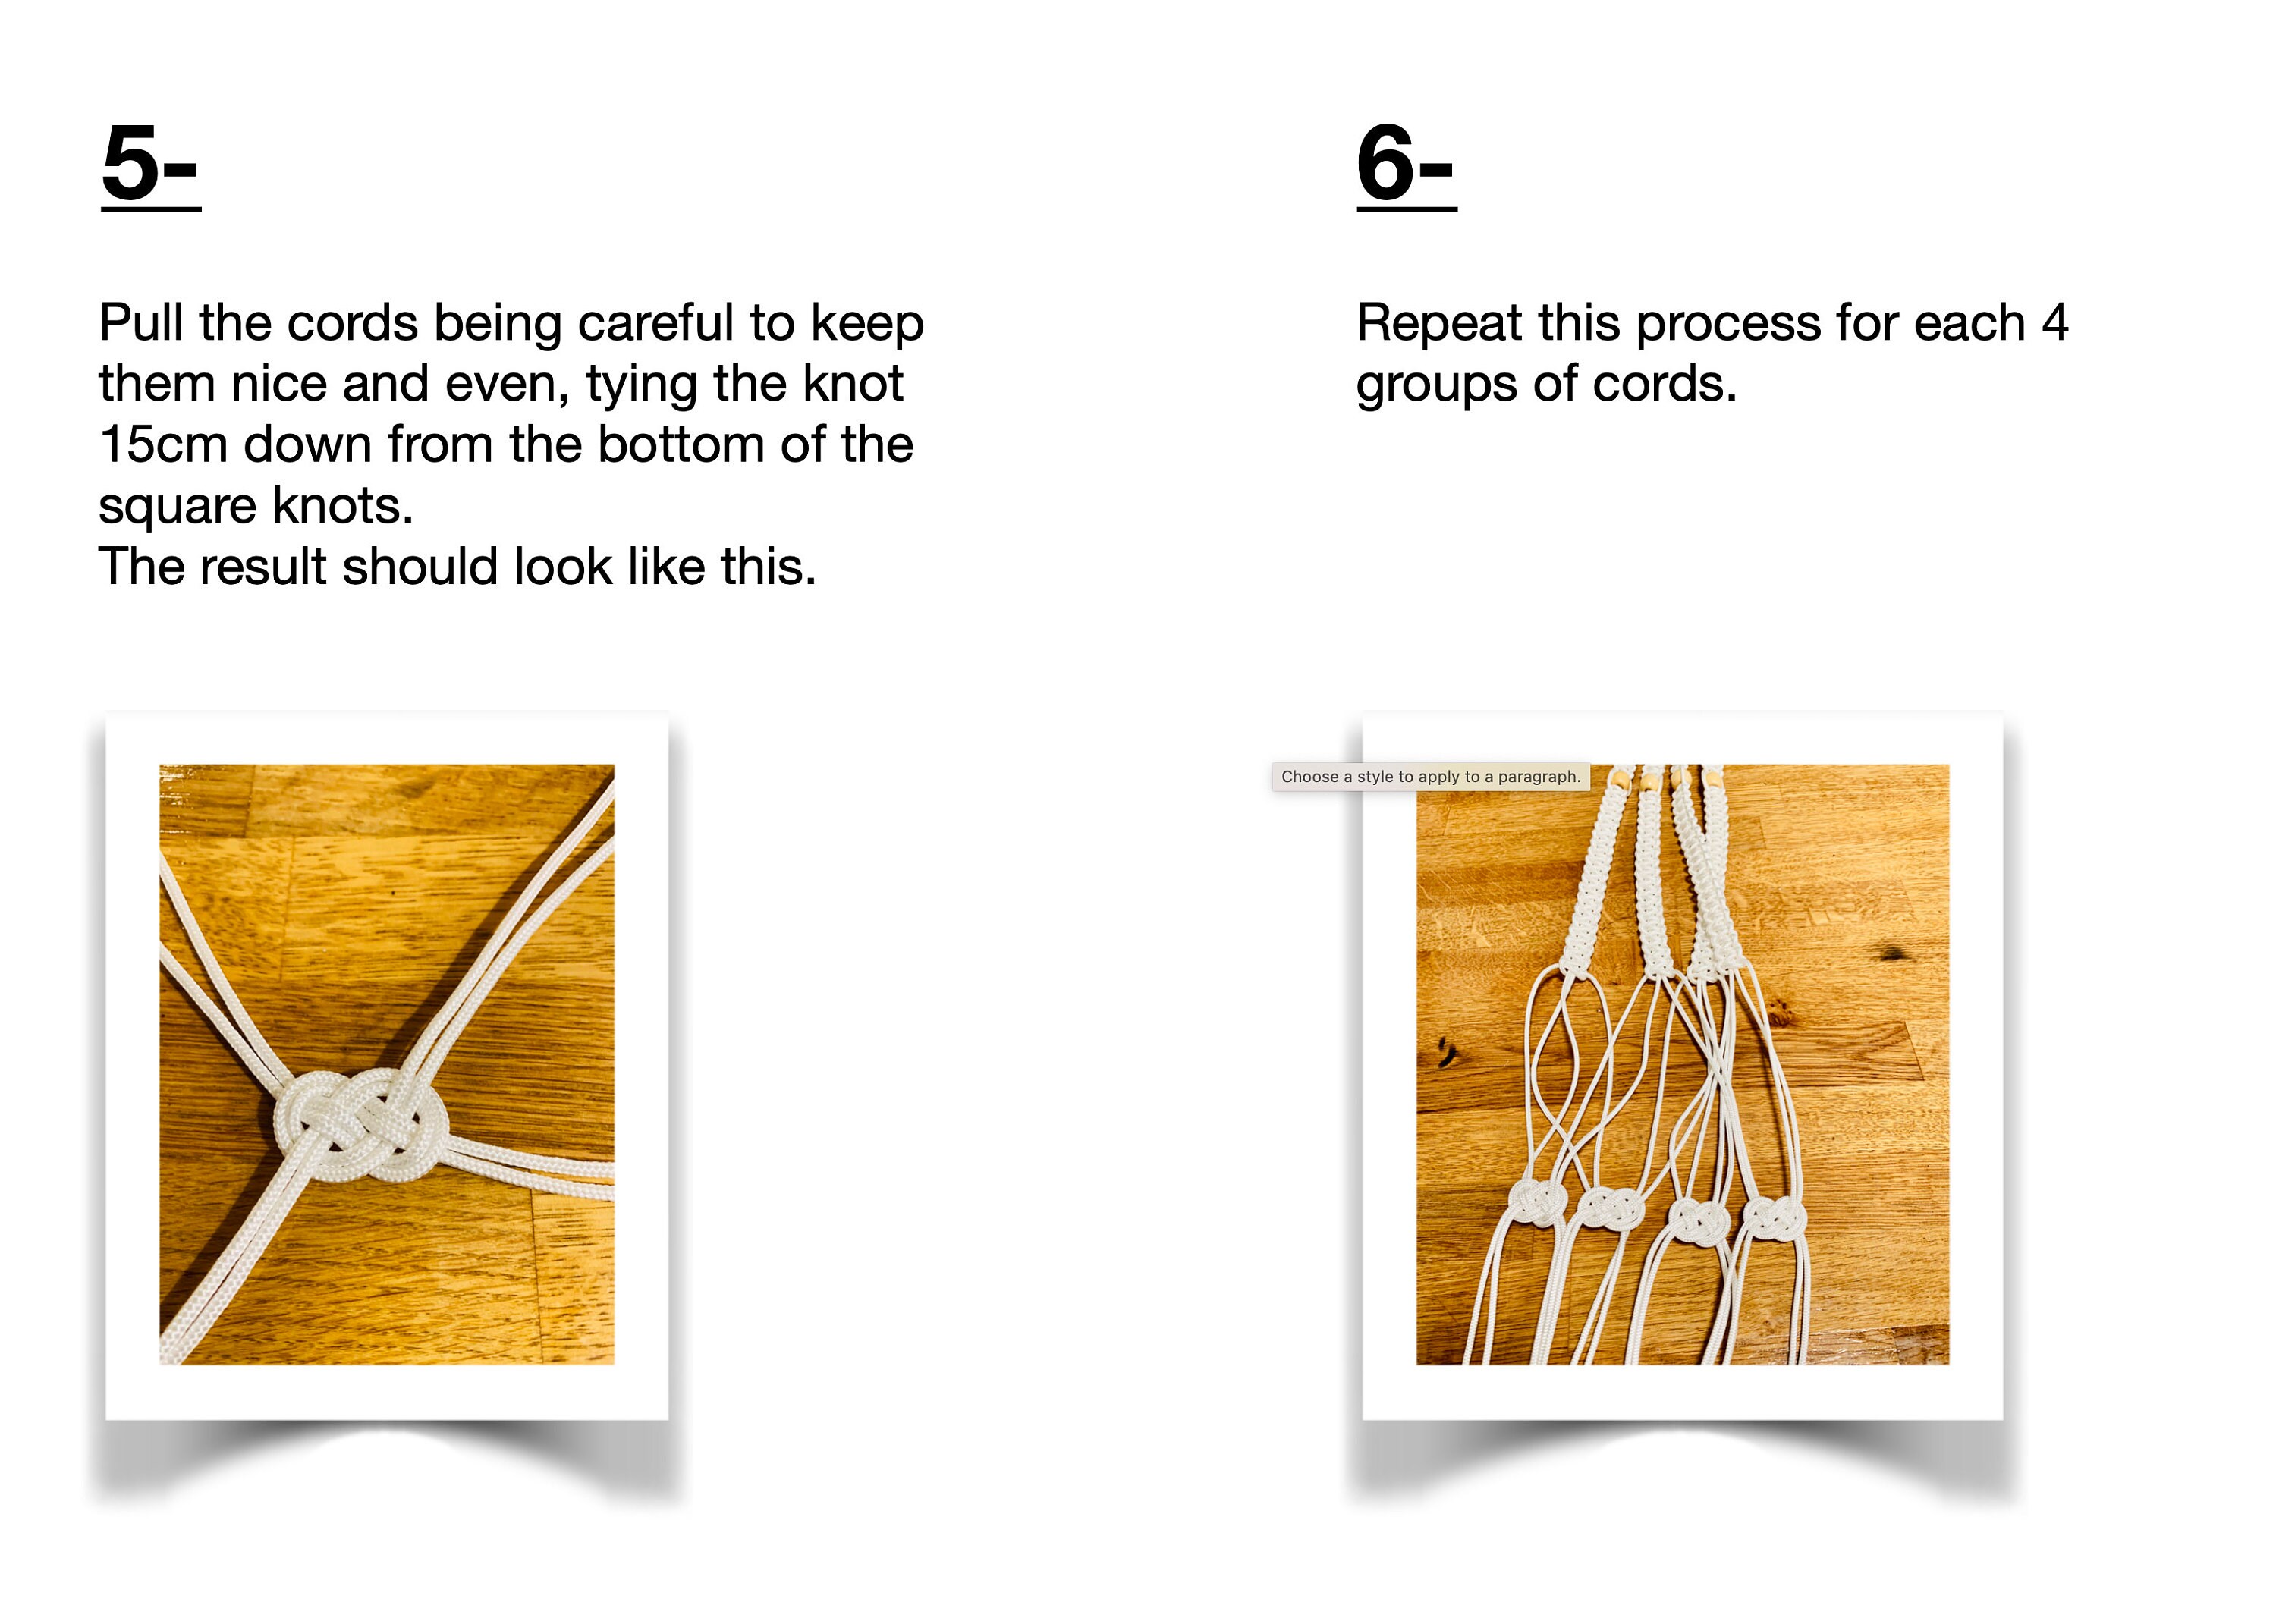
It’s time to start the base of your pot holder (the part that is going to wrap around and underneath the pot). In this step we are going to tie 4 Josephine knots 10cm down from the bottom of the square knots with 4 cords each.
• Step 7: third row of square knots
One more row of square knots! 10cm down from the previously tied Josephine knots.
• Step 8: tail ends
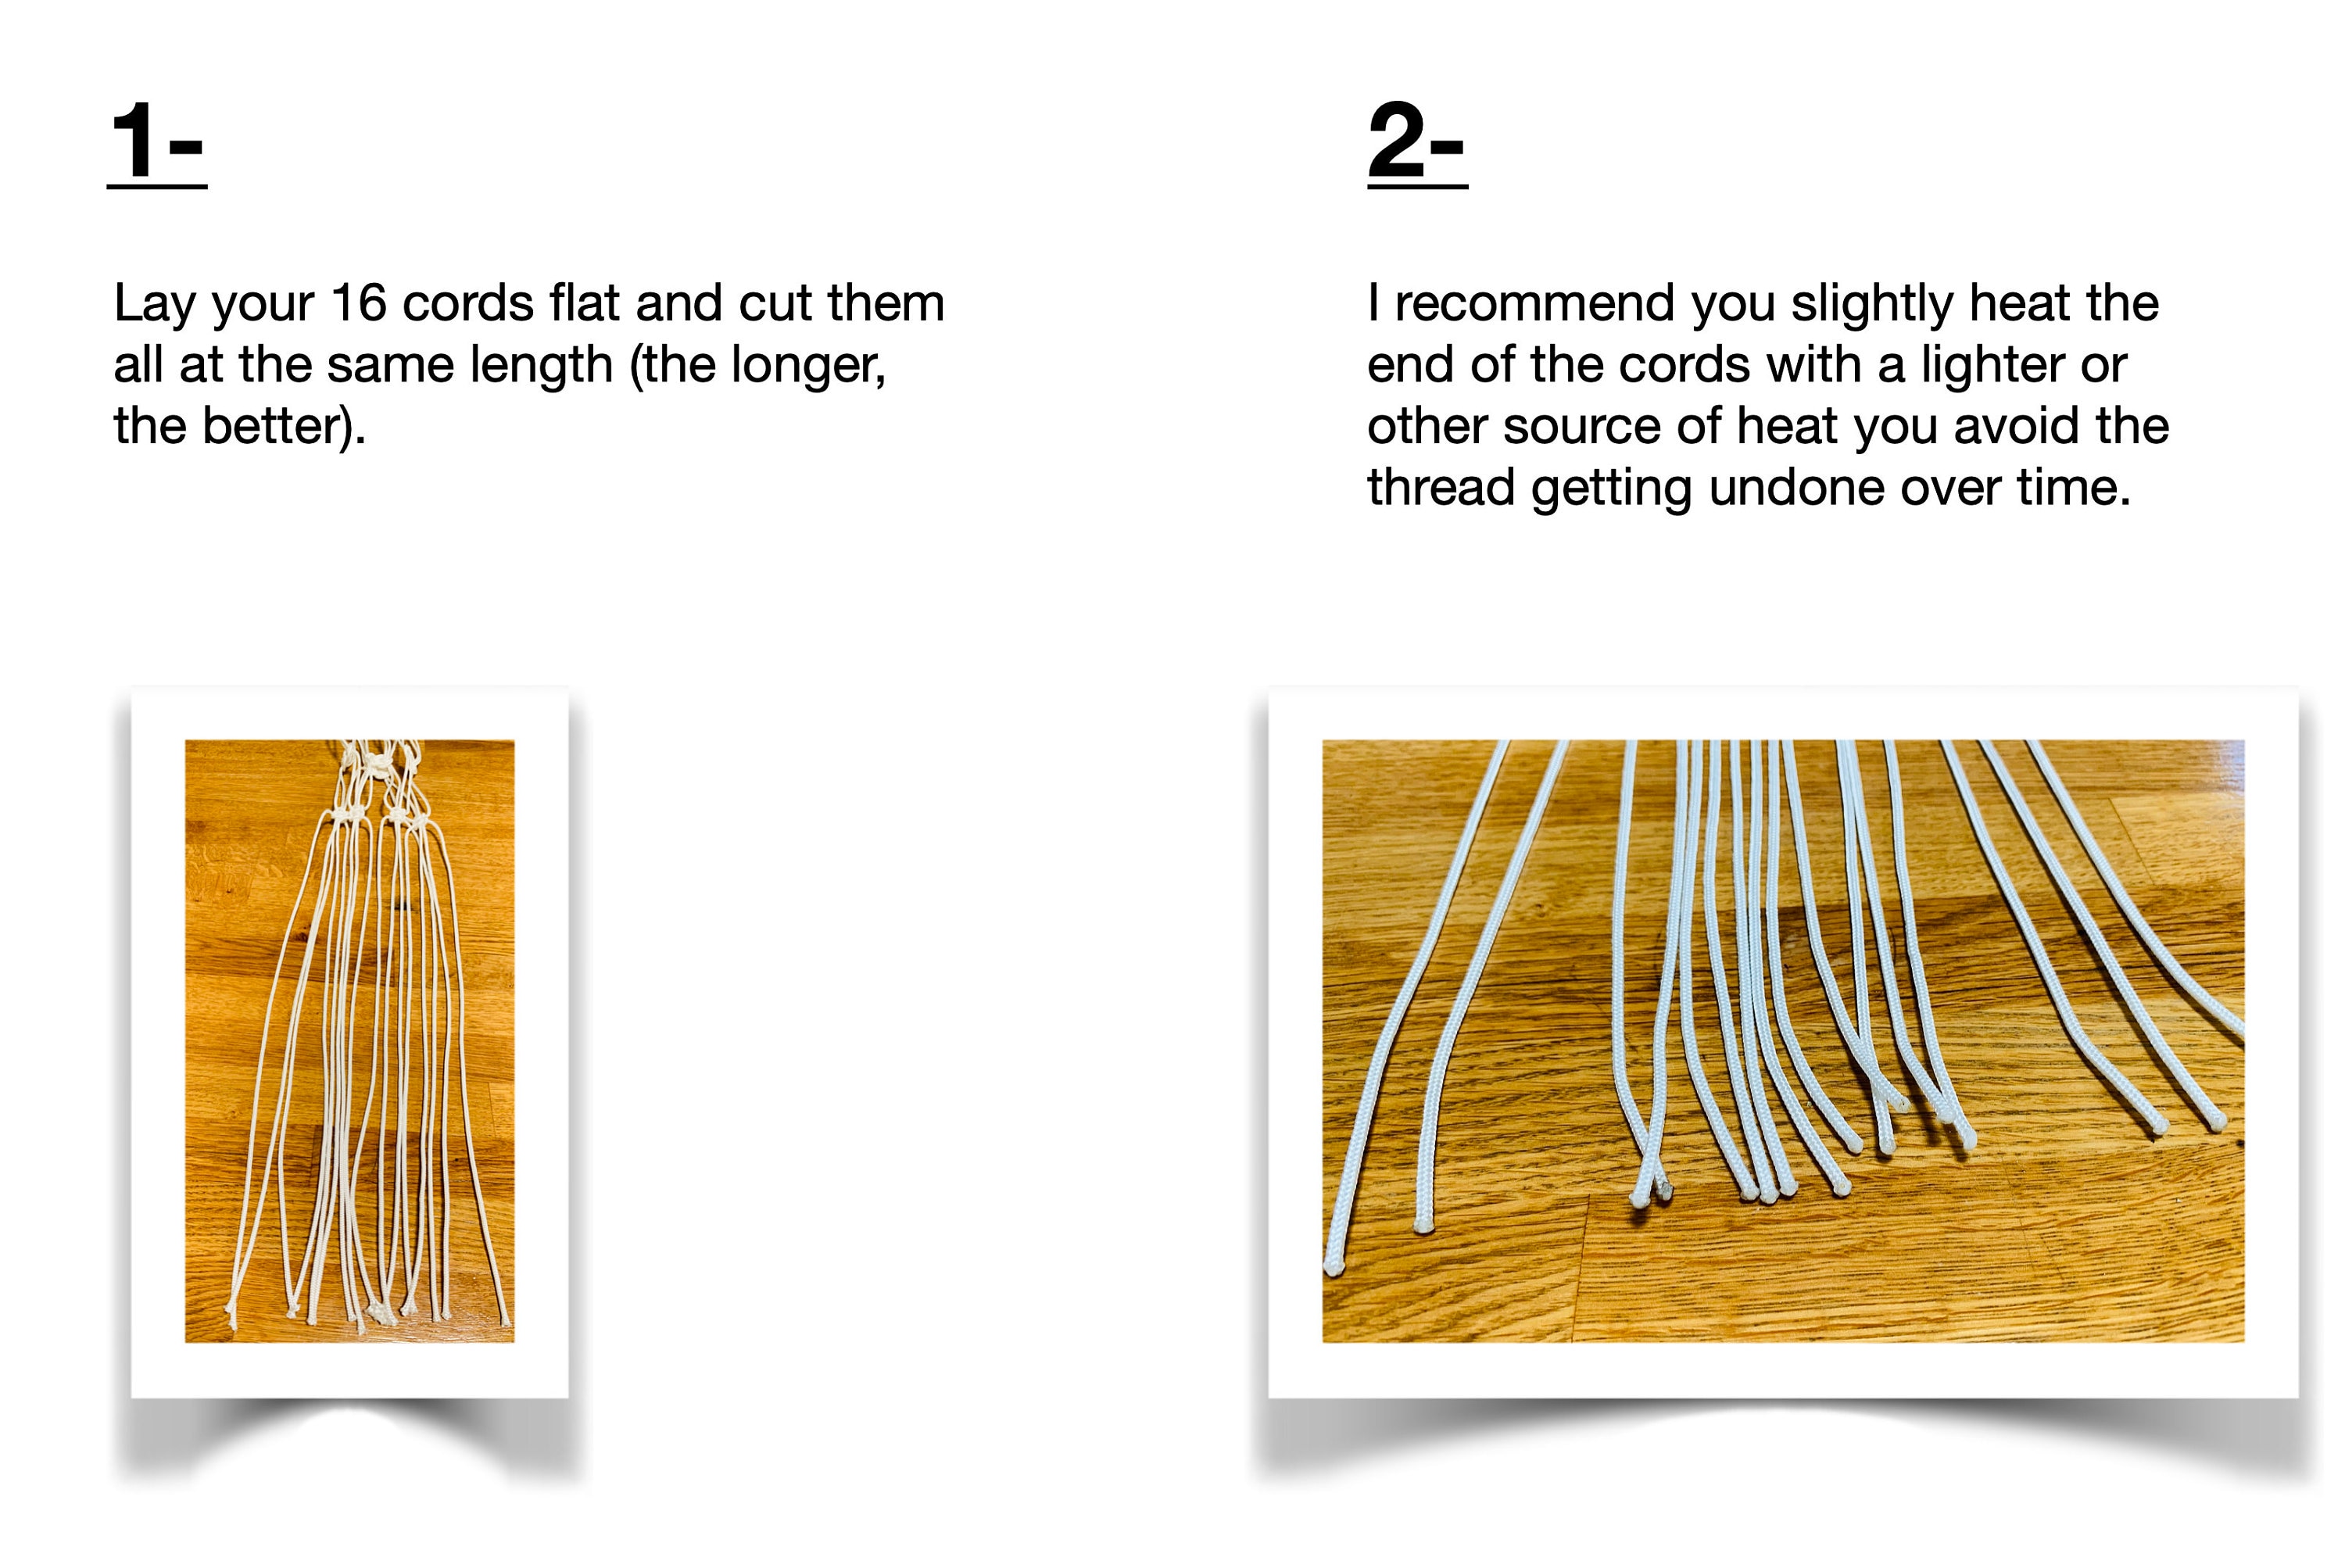
Note that I used a synthetic cord for an outdoor plant hanger, if you are using cotton cord (or any other natural material) you won't be able to stop the ends of your cords from unravelling by heating them (you'll just burn the cord). I recomend you put a little dab of glue on each of the ends for natural fibers.
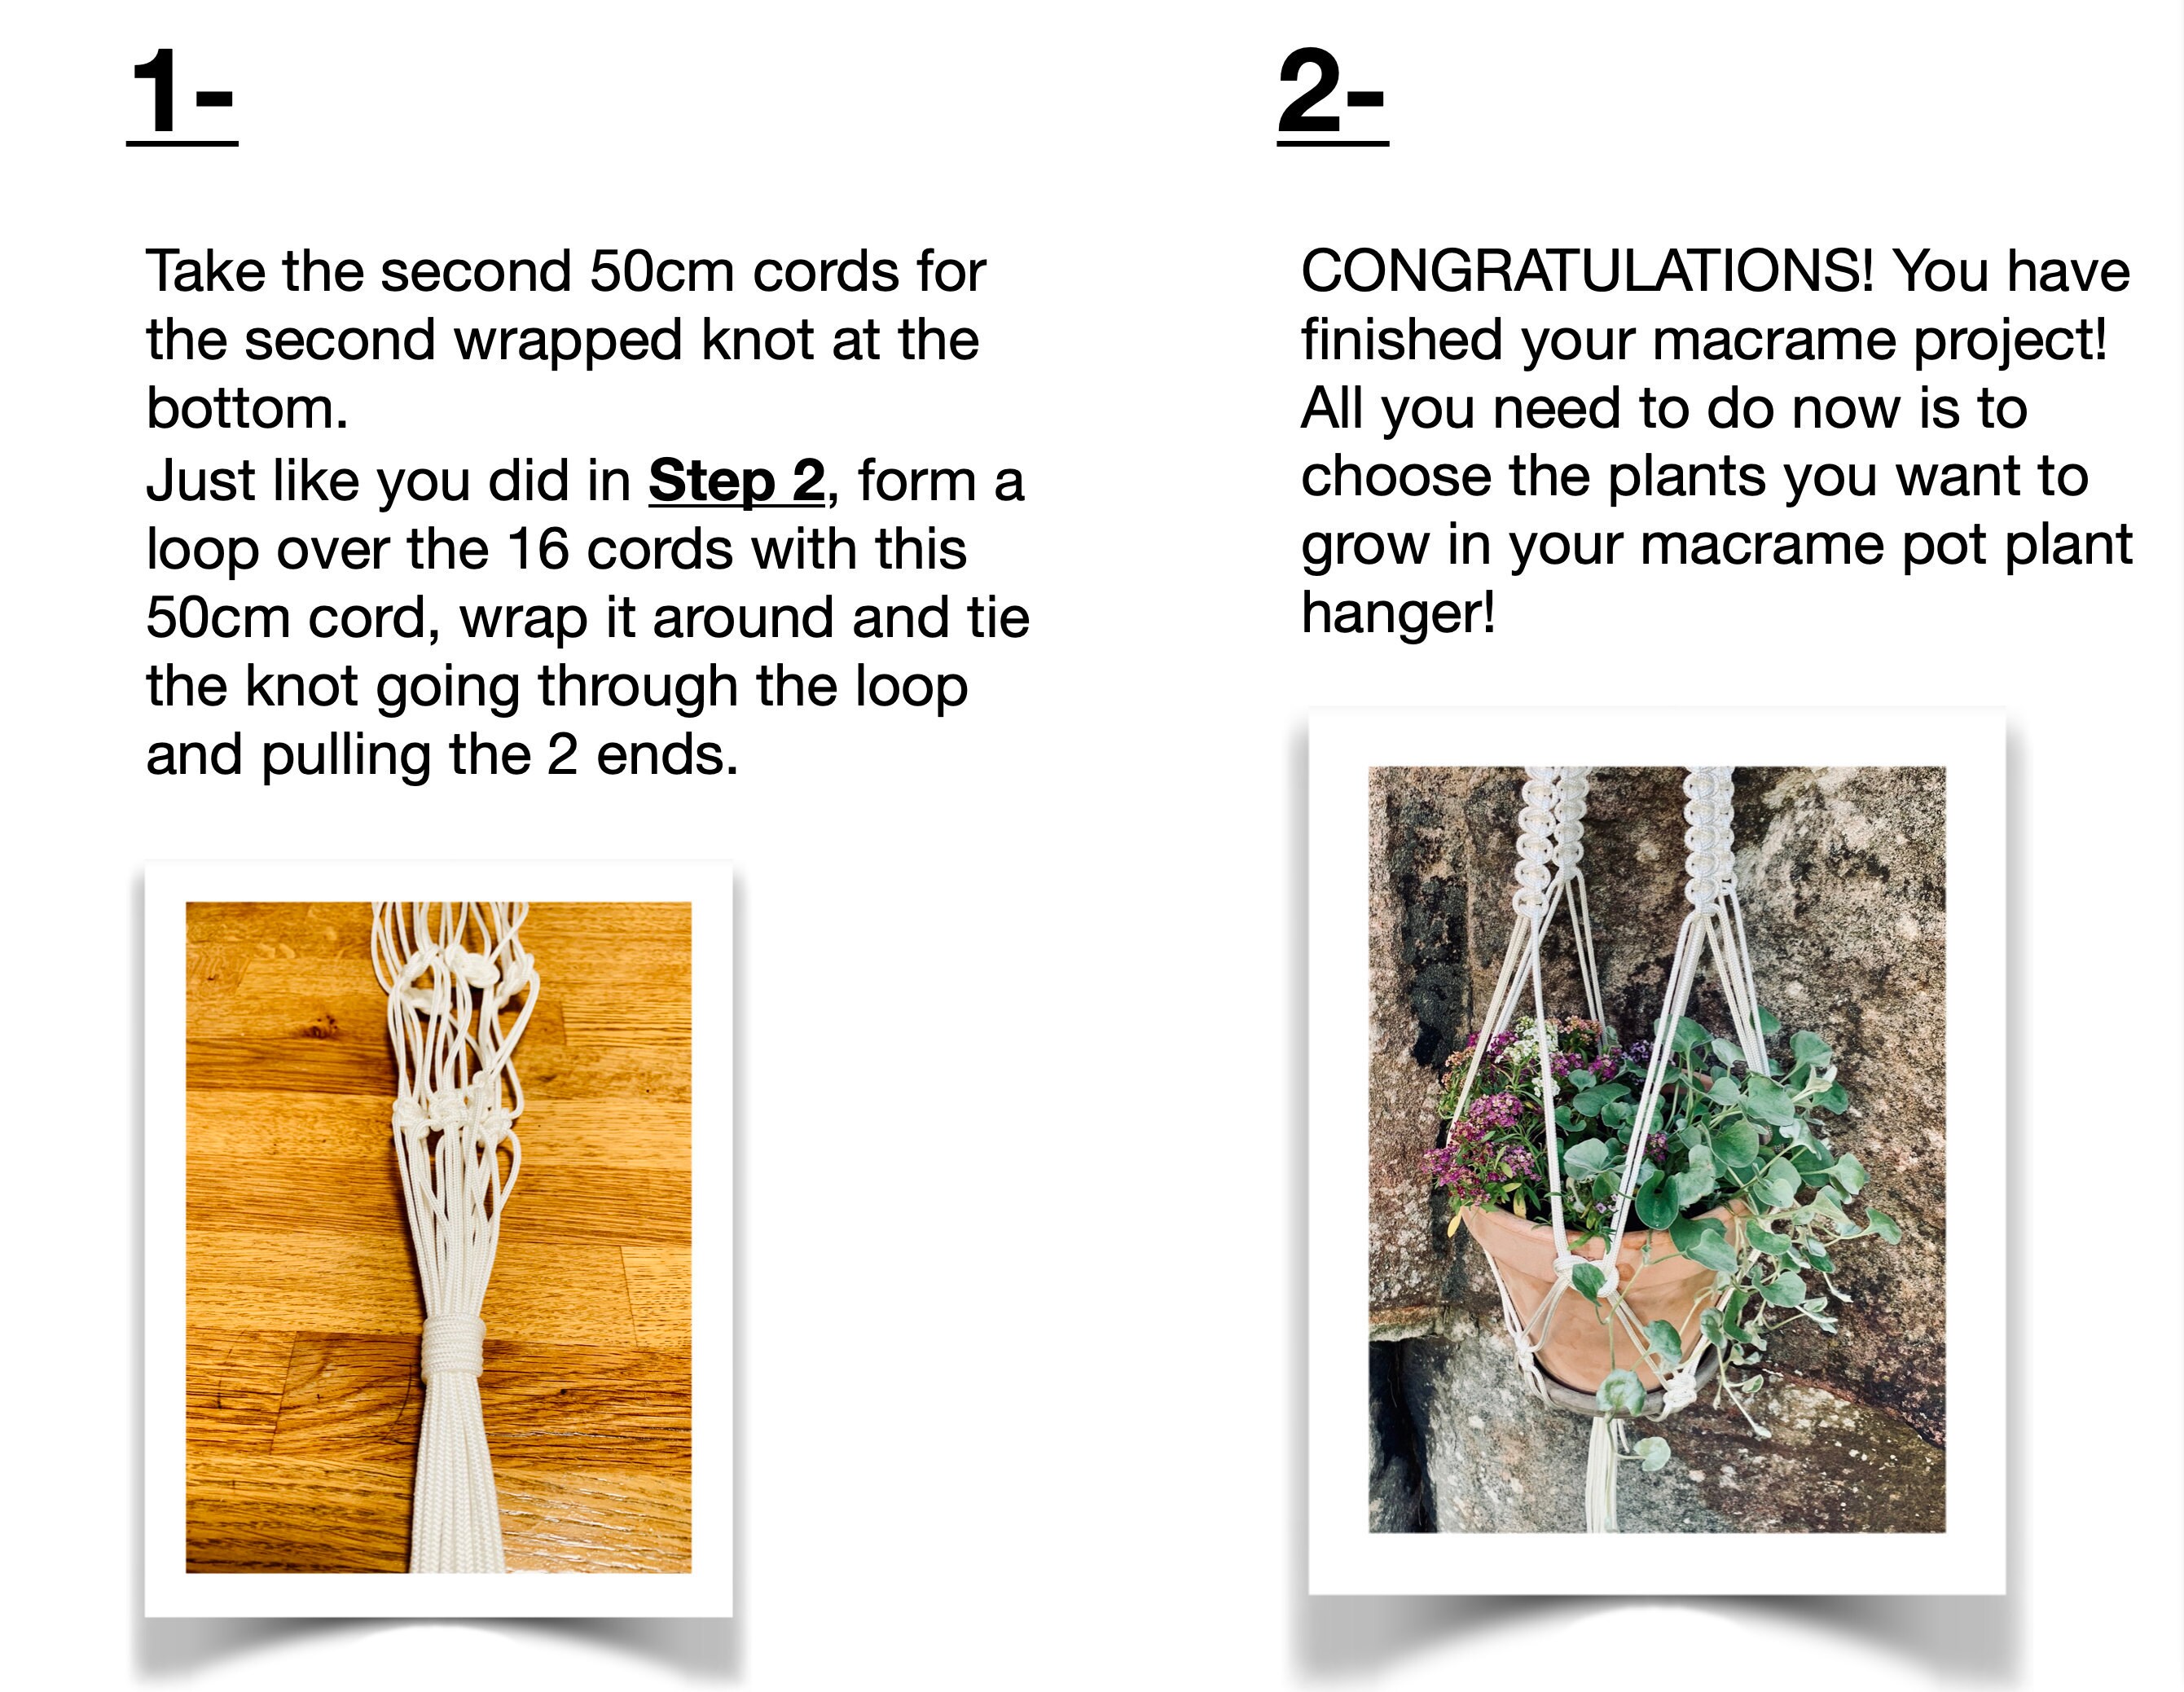
• Step 9: tail wrapped knot